Help Center
Get started
Navigating Your Leased Subnet
This guide walks you through finding your subnet in the IPbnb platform and understanding the controls available to you.
3
min.
Reading time
Beginner
Complexity level
Table of Contents
item
After your lease is confirmed, your subnet needs to be configured before it can carry traffic.
Accessing Your Leased Subnets
Log in to your IPbnb account at my.ipbnb.com
In the left navigation menu, click Rented Subnets
You'll see a list of all subnets currently leased by your company
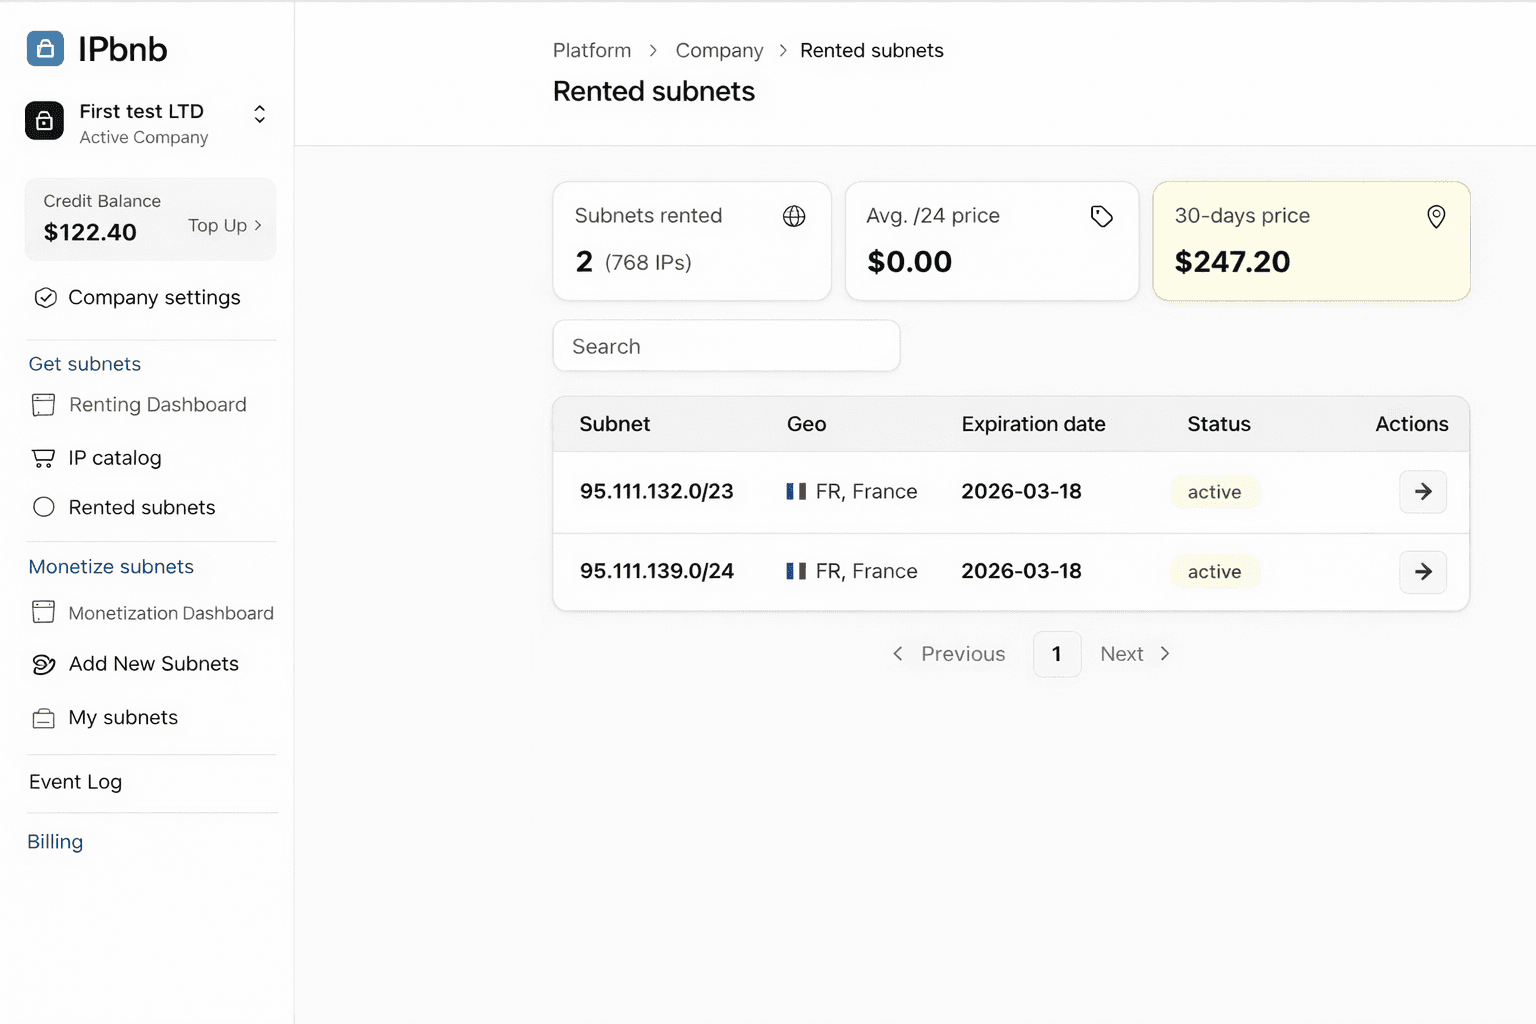
Click the subnet you want to configure — this opens the Subnet Management Page
The Subnet Management Page
The Subnet Management Page is your control center for each leased subnet. Here is what each section contains.
Section 1: Subnet Overview
A dashboard displaying general information:
Subnet Address: The IP range you leased (e.g., 185.123.45.0/24)
Status: Current state (Active, Pending Configuration, Suspended, etc.)
Lease Start Date: When your lease began
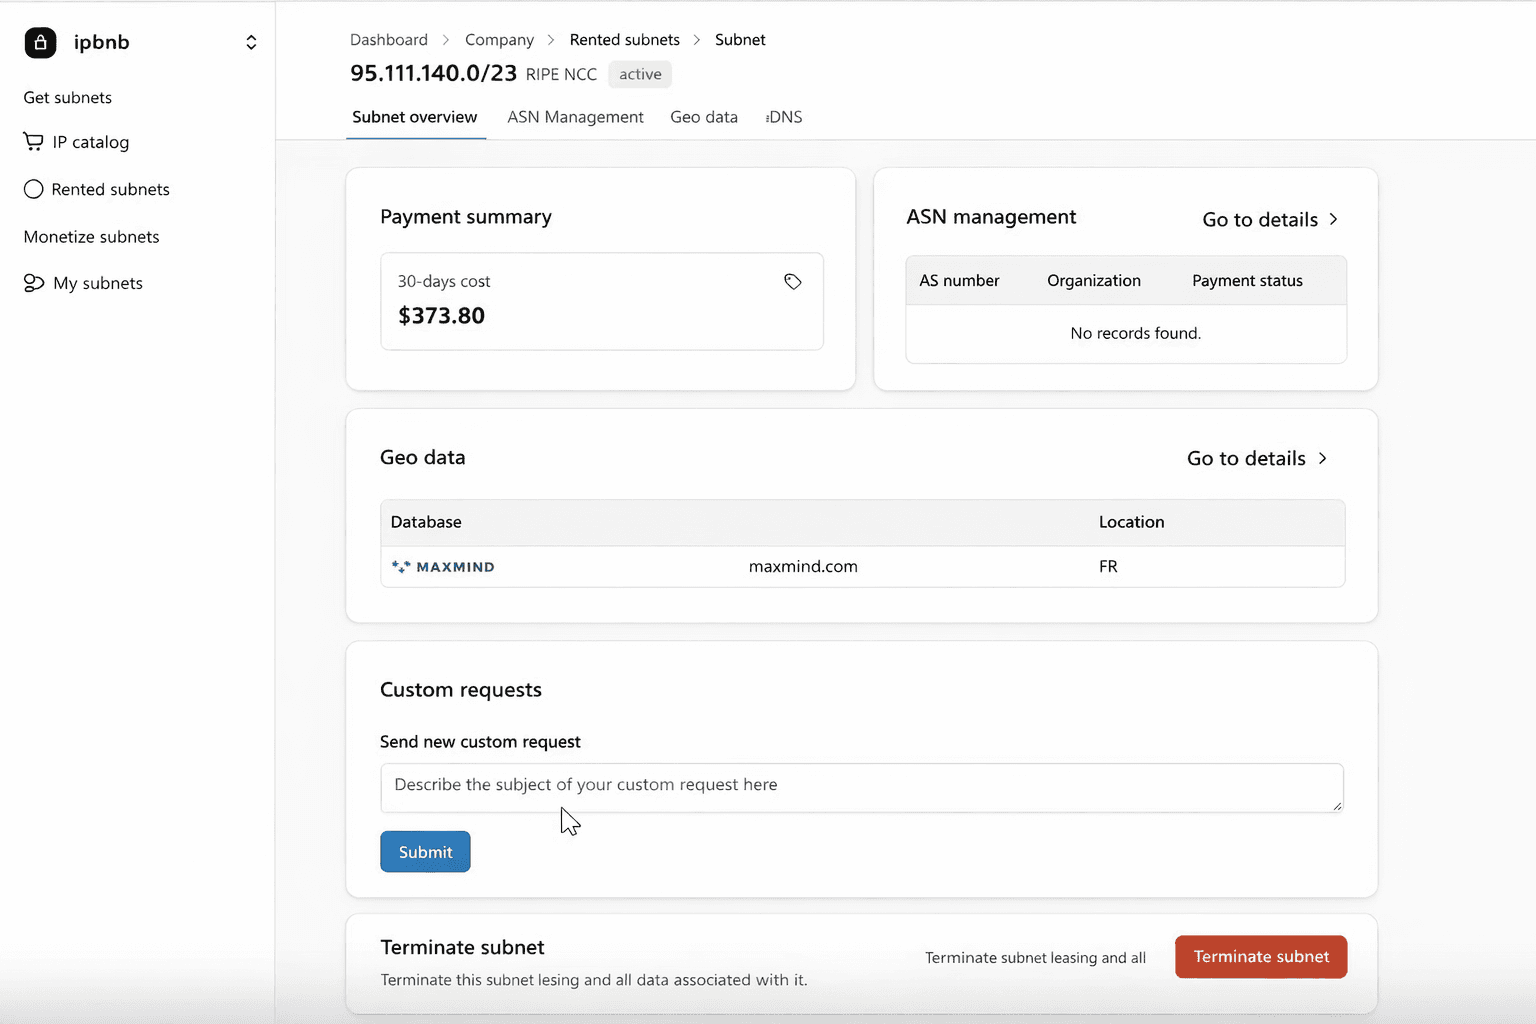
Section 2: ASN Management
This is the most important section.
Here you manage which Autonomous System Numbers (ASNs) are authorized to announce this subnet. See Configuring Your Subnet: Adding an ASN and Setting Up ROA for full instructions.
Key information displayed:
Currently Assigned ASNs: List of ASNs already configured
ROA Status: Whether Route Origin Authorization is active
Add ASN Button: To configure a new ASN
Critical: You MUST add at least one ASN before you can use your subnet.
Section 3: Geo Data
Optional geolocation management:
Current Geolocation: Where the subnet is registered
Update Geolocation: Request changes if needed
Note: This is optional and doesn't affect functionality
See Advanced Configuration: Multiple ASNs, Geo Data, and DNS for instructions.
Section 4: DNS Management
Optional reverse DNS (PTR records) configuration:
Current PTR Records: Reverse DNS entries
Add/Edit PTR Records: Configure hostname resolution
Note: Recommended for mail servers, optional otherwise
See Advanced Configuration: Multiple ASNs, Geo Data, and DNS for instructions.
Section 5: Custom Requests
Contact helpdesk for issues that cannot be resolved through the platform interface:
Technical problems
Billing disputes
Configuration assistance
Special requirements
When you submit a custom request:
It goes directly to IPbnb support team
Response within 24 hours
Request history is tracked
Section 6: Terminate Subnet
Option to end your lease:
Terminate Button: Starts termination process
Warning messages displayed
Confirmation required
See the Managing Your Subnet guide for detailed termination instructions.
What to Do Next
Your first mandatory step is adding an Autonomous System Number (ASN) to your subnet. Until this is done and a Route Origin Authorization (ROA) is created by the subnet owner, your subnet cannot carry traffic.
Related articles