Help Center
Get started
How to Prepare Your Subnet in RIPE Before Listing on IPbnb
Before you can list your subnet on IPbnb, a few things need to be in place on the RIPE side.
9
min.
Reading time
Beginner
Complexity level
Table of Contents
item
This guide walks you through everything — checking your address status, understanding the /24 rule, and setting up your inetnum object correctly so verification goes smoothly.
If you haven't registered on IPbnb yet, start with Creating Your Account and Completing Verification. Once your subnet is ready, you can move on to How to Add a Subnet Listing on IPbnb.
Understanding RIPE Requirements
IP Address Status: PA vs PI
Your IP addresses must have PA (Provider Allocated) status to be listed on IPbnb. Here's why this matters:
PA addresses can be sub-allocated and leased to others (allowed by RIPE policy)
PI (Provider Independent) addresses can only be used by the owner (leasing violates RIPE policy and may result in address revocation)
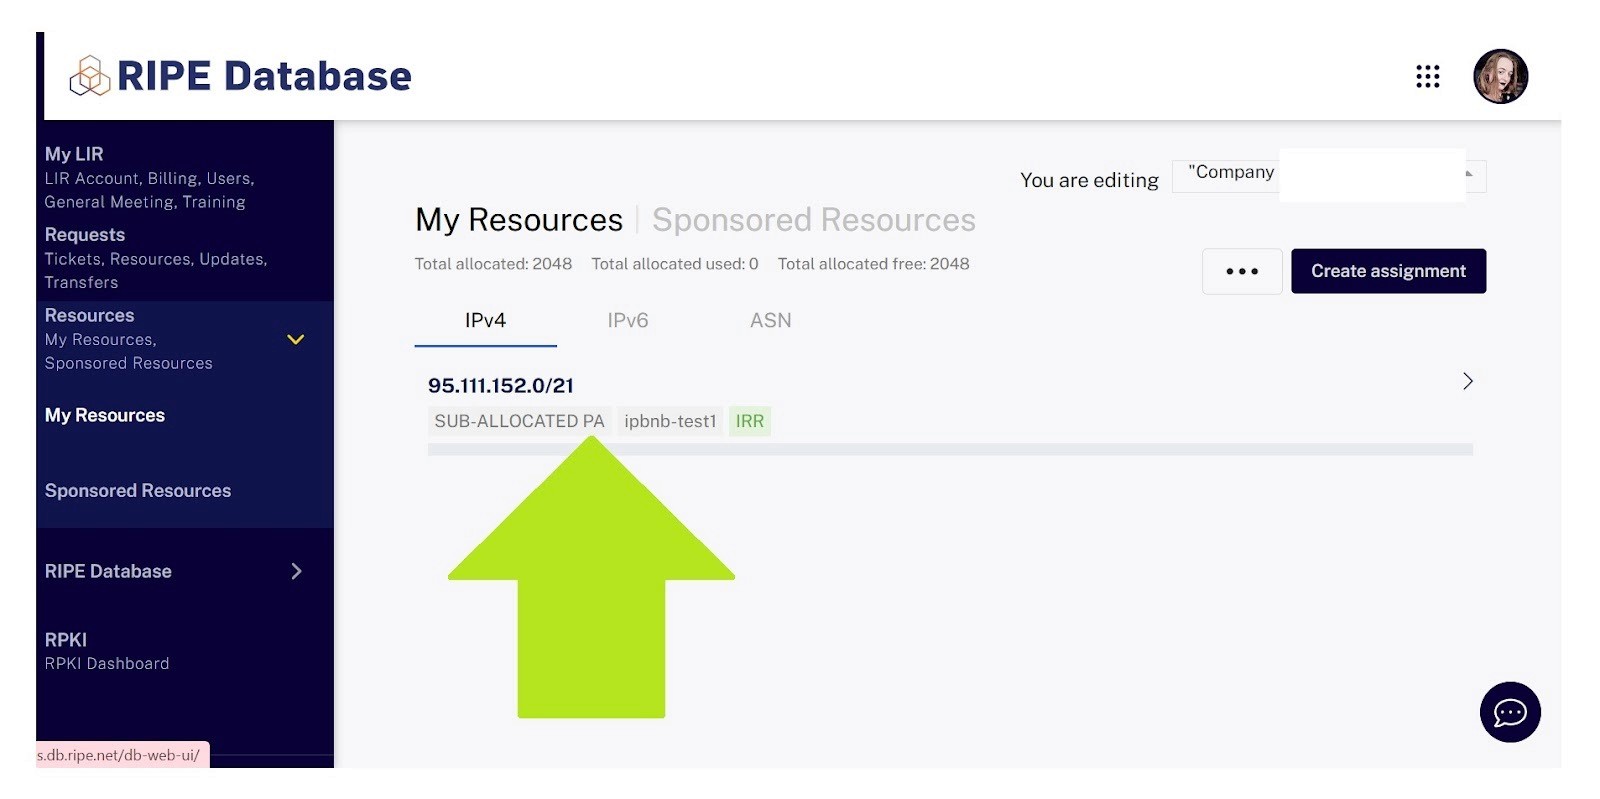
You can check your address status in the "My Resources" section of your LIR portal.
Where to find "PA" or "PI" status:
The /24 Rule
RIPE policy requires that allocations larger than /24 must be divided into smaller blocks before leasing. This means:
If you have a /24 allocated PA subnet (256 addresses): You can lease it as one block
If you have a /21, /22, /23, etc.: You must split it into at least two separate blocks
Example: You own a /21 block (2,048 addresses) and want to lease 1,024 of them. You'll need to create a /22 inetnum object for the portion you want to lease.
Part 1: Preparing Your Subnet in RIPE
Every IP address owner has access to the LIR portal.
Go to https://access.ripe.net/
Log in using two-factor authentication:
Enter your email and password
Verify with your authentication app's one-time code
Navigate to the LIR portal from the top menu
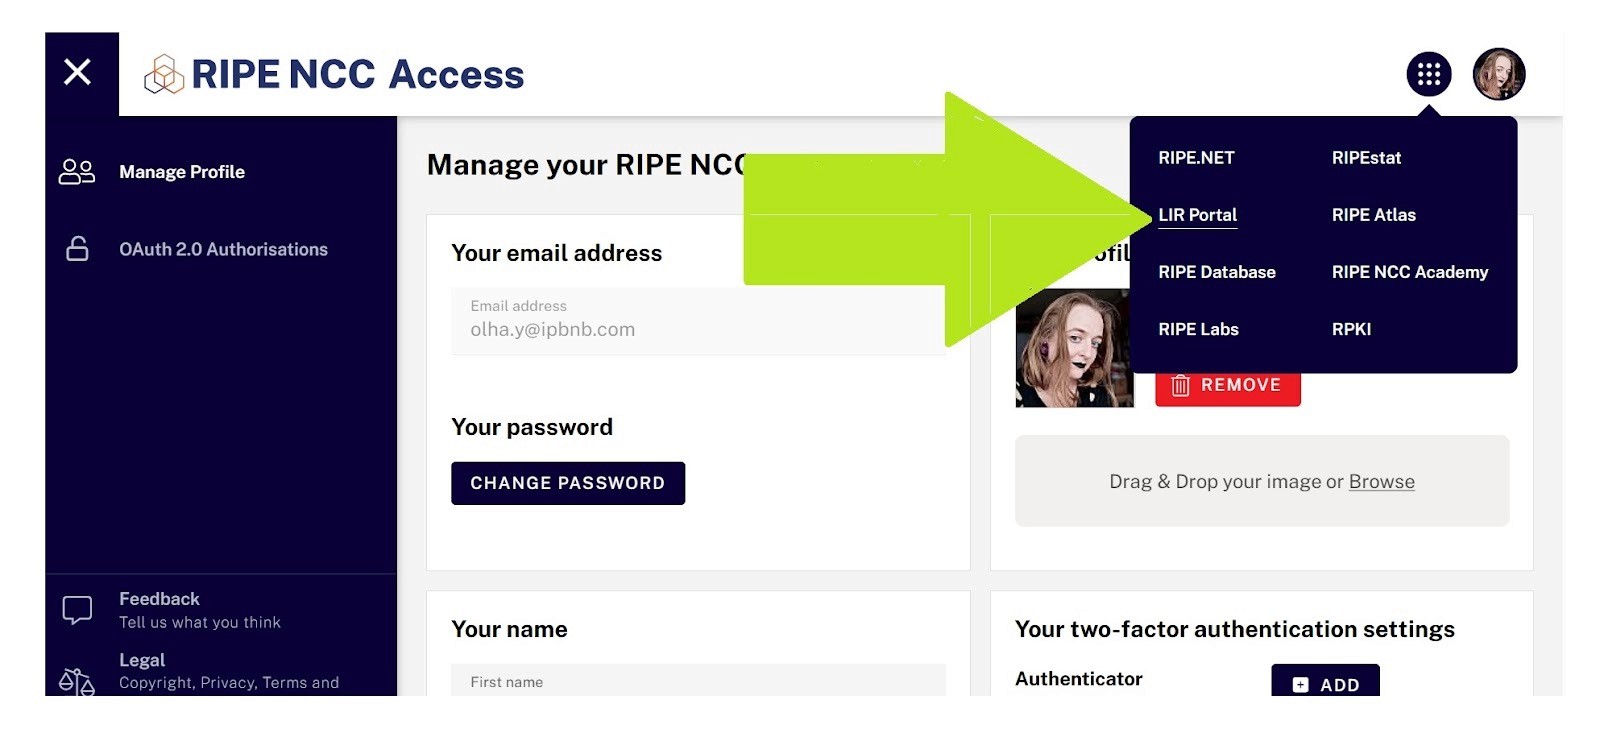
Open the "My Resources" tab

Step 2: Choose Your Scenario
Choose the path that matches your situation:
Scenario A: My subnet is larger than /24 → Continue to Step 3A
Scenario B: My subnet is exactly /24 ALLOCATED PA → Jump to Step 3B
Step 3A: For Subnets Larger Than /24
Why this step is necessary
When your subnet is larger than /24, you need to create a new, more specific inetnum object. This allows IPbnb to manage just the portion you want to lease while you retain ownership of the parent block.
Before you begin
Clear all existing data from the subnet you plan to lease:
Remove all sub-objects and related entries from the RIPE database
Remove all ROA records from the RPKI database
Ensure the addresses are not announced on the internet
Verify there are no active BGP announcements (either standalone or as part of a larger block)
Common mistake: Forgotten legacy data is the #1 cause of verification failures. Double-check that nothing from past usage remains.
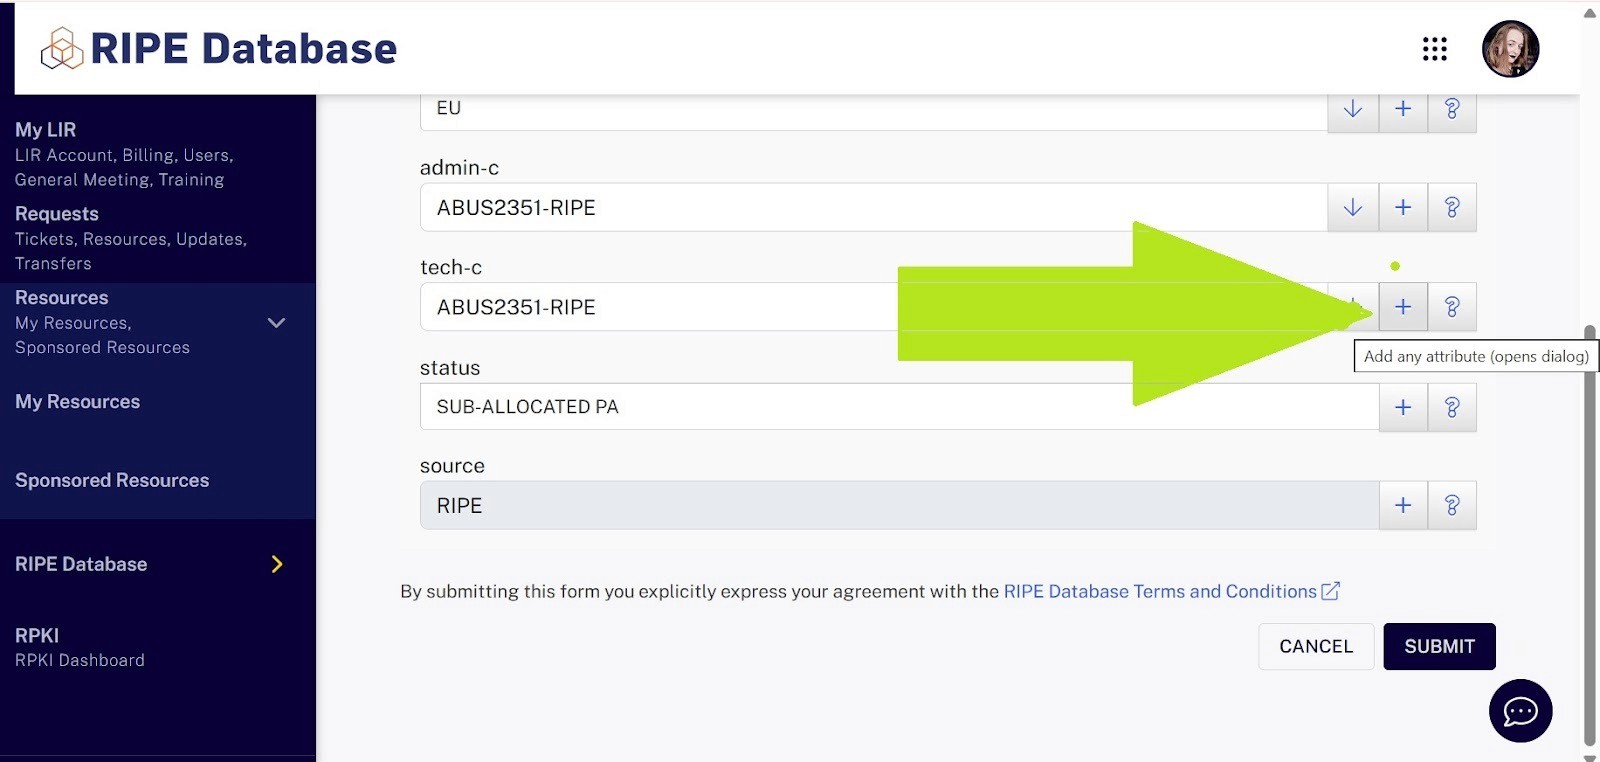
Creating the new inetnum object
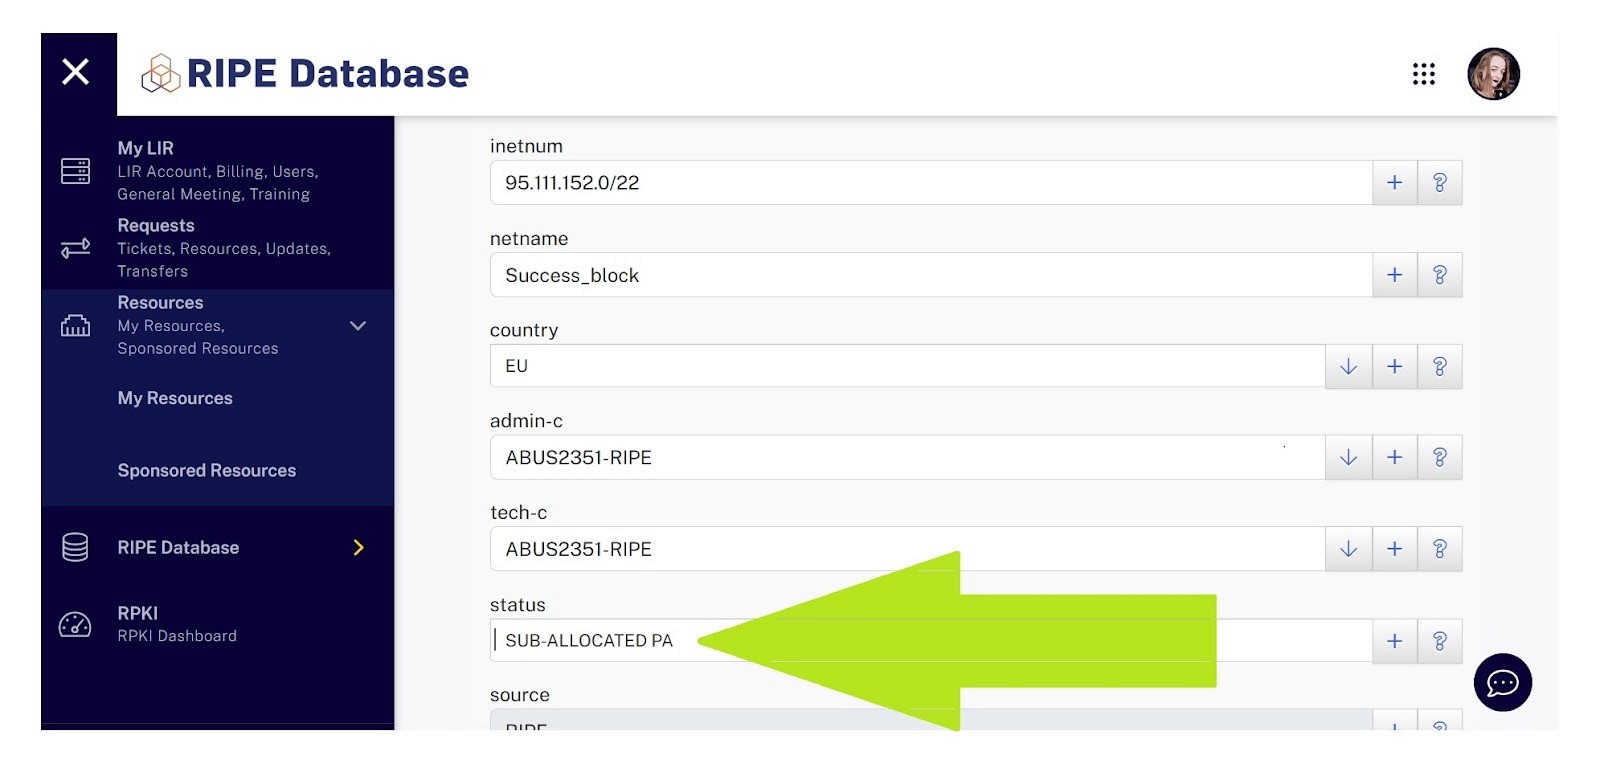
In your LIR portal, go to RIPE Database → Resources → My Resources → Create assignment
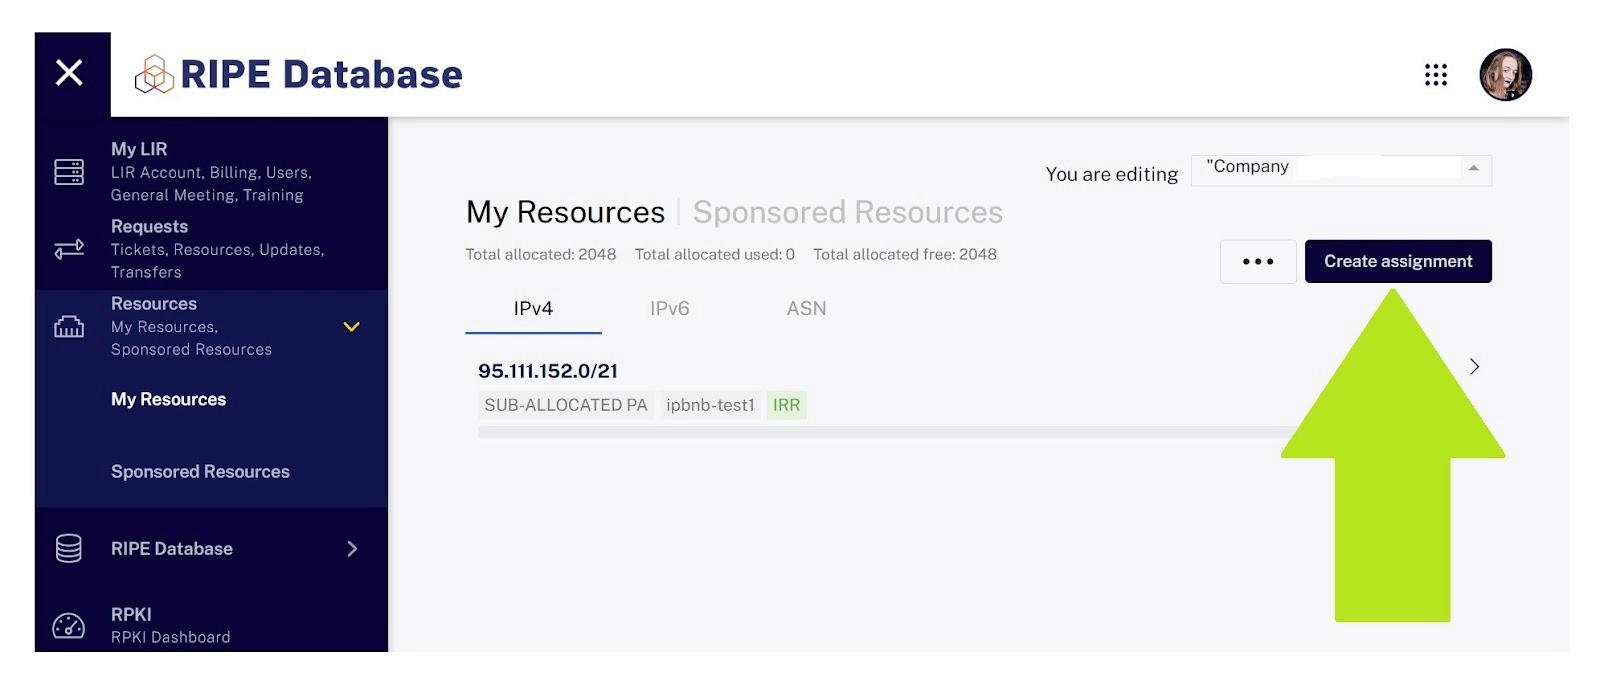
Fill in the required fields:
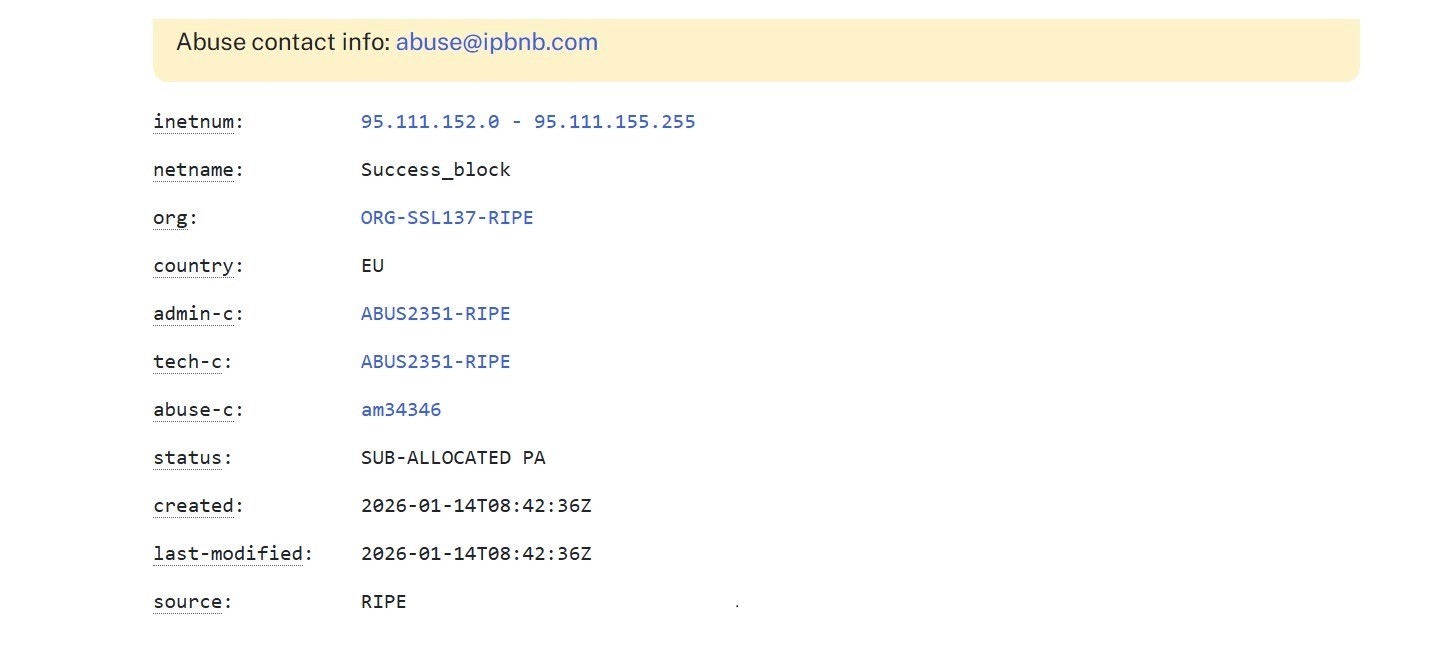
inetnum: Enter your subnet in CIDR format (e.g., 95.111.152.0/22). The last octet must be higher than the parent object's last octet
netname: Choose any name (Latin characters only, no spaces). Example: IPBNB-LEASE-BLOCK-1
country: Your country code (e.g., NL, DE, FR)
admin-c: Administrative contact (choose from your existing contacts)
tech-c: Technical contact (choose from your existing contacts)
status: This is critical — Must be set to SUB-ALLOCATED PA. This status allows IPbnb to manage the subnet while you retain ownership. Without this exact status, verification will fail.
Example of filling in data for a new object. Note the status line:
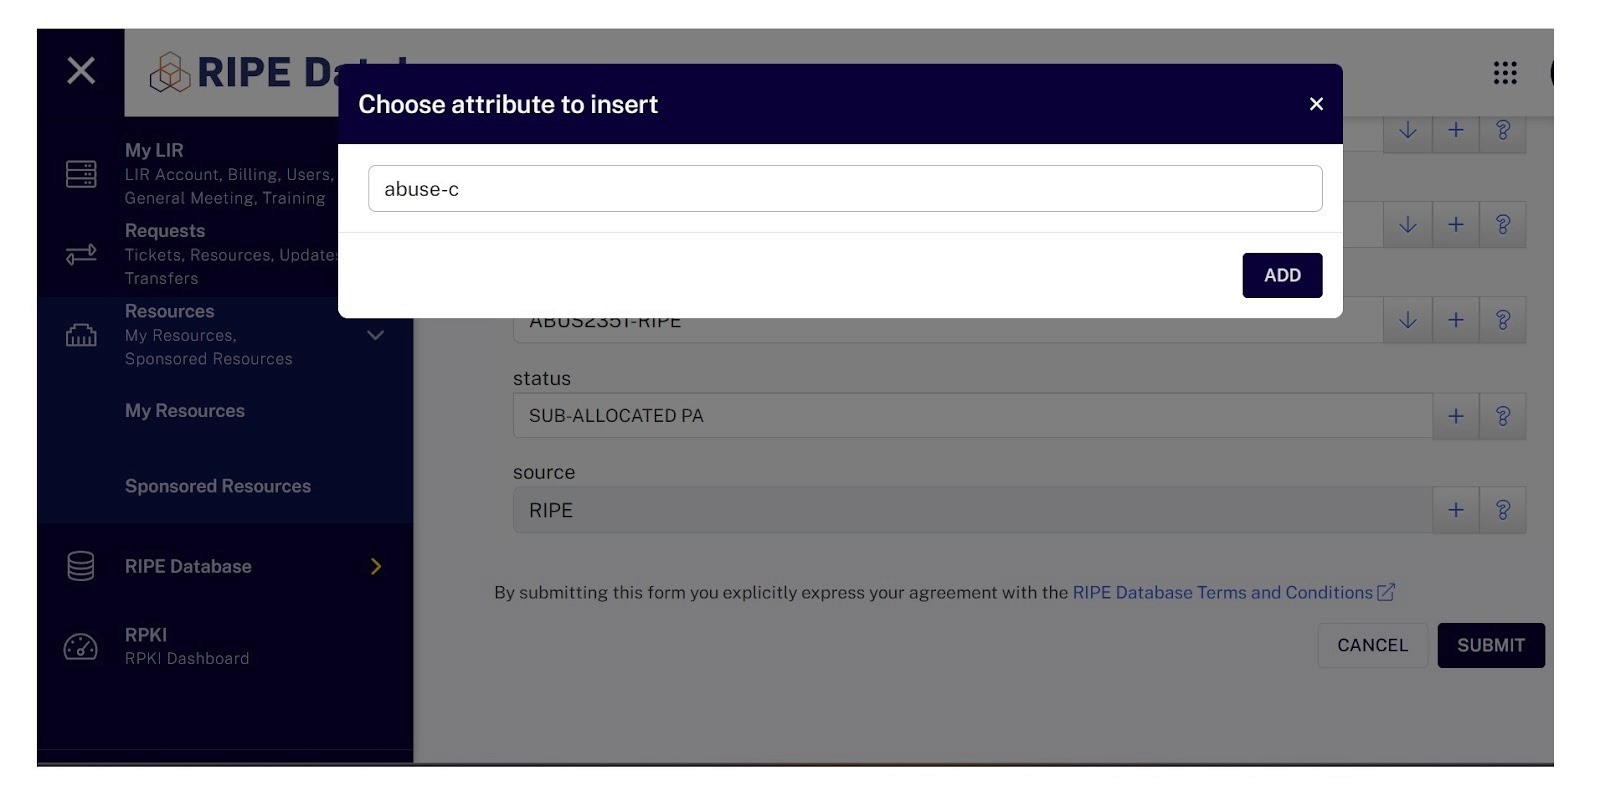
Add the required optional fields by clicking the + button:
organization (org): Your organization code from RIPE.
Important: You must have access to the abuse-mailbox email for this organization. Verification emails will be sent to this address.
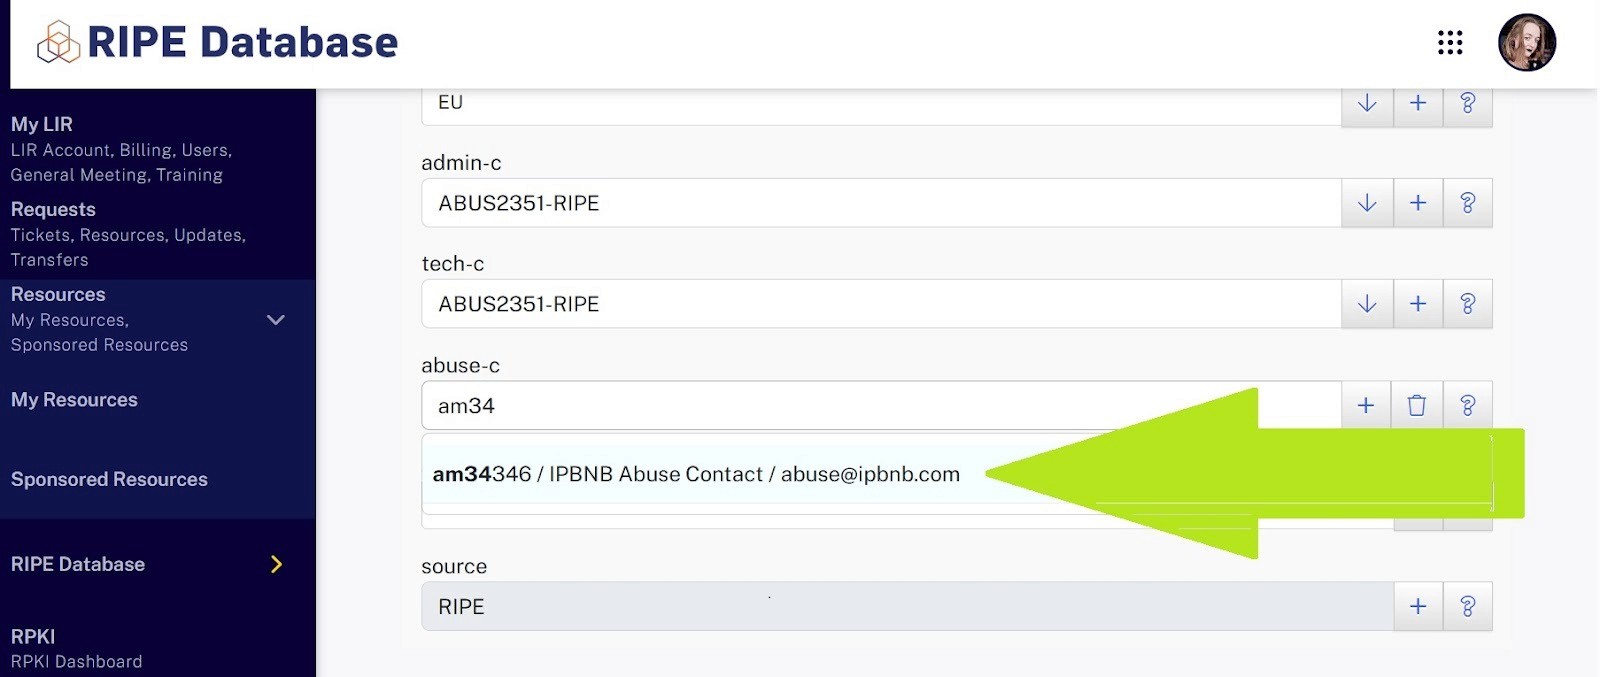
abuse-c: Enter AM34346 (IPbnb's abuse contact). This is required for marketplace listing.
How to add: Click + next to an existing field → Select abuse-c → Enter AM34346
How to add IPbnb as the abuse contact:
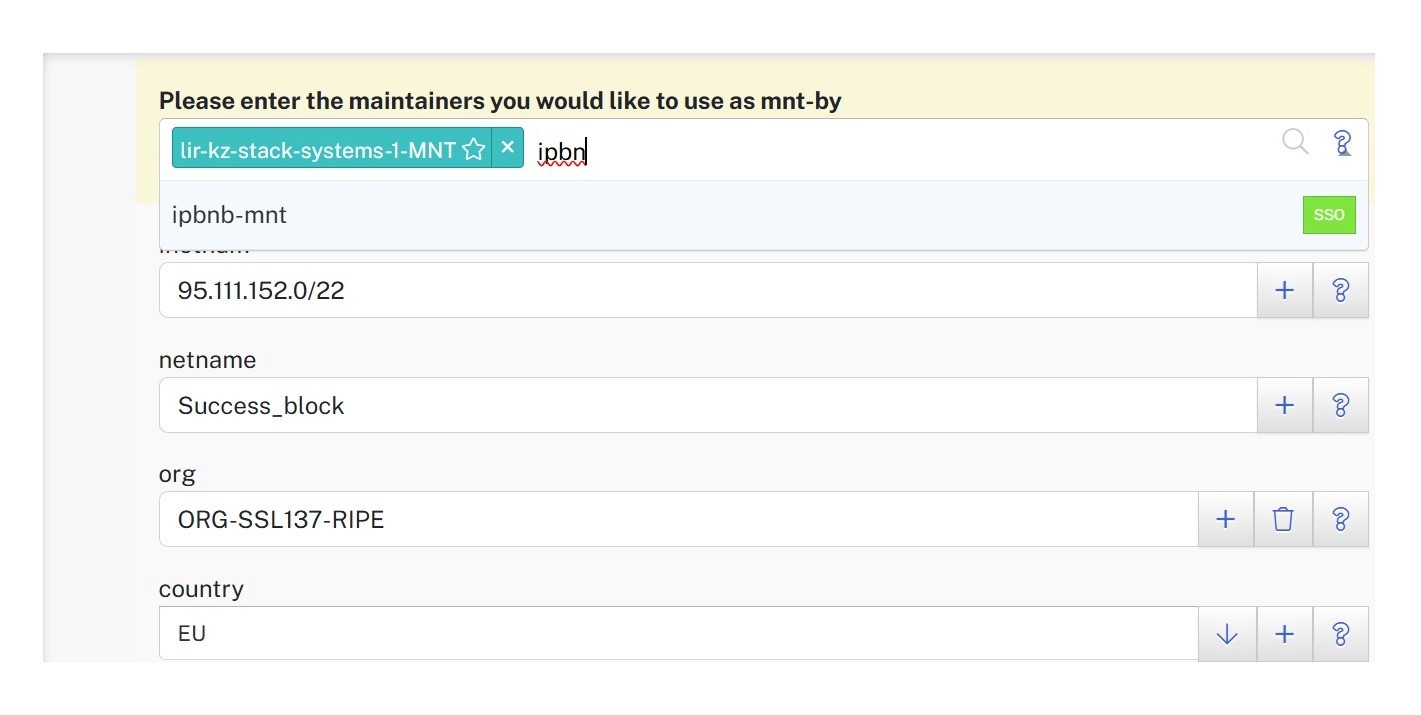
mnt-by: Add IPbnb-MNT (IPbnb as maintainer)
This allows IPbnb to make necessary RIPE database updates on your behalf. You remain the owner; this only grants management rights for leasing purposes.
How to specify IPbnb as the maintainer:
Review your entries and click SUBMIT
Verification checkpoint
Check your new object in the RIPE database:
Search for your subnet at https://apps.db.ripe.net/db-web-ui/query
Verify all fields are correct, especially status, abuse-c, and mnt-by
Confirm the object appears with no errors
Step 3B: For /24 Subnets
Why this step is different
A /24 subnet cannot be split further, so you'll edit the existing root object instead of creating a new one.
Important limitation
The root object must have your LIR as the primary maintainer (mnt-by). However, you can add IPbnb as a lower-level maintainer, which is sufficient for marketplace operations.
Editing your /24 object
In the RIPE database, search for your /24 subnet
Click Modify on the inetnum object
Add or update these fields:
abuse-c: Set to am34346 (IPbnb's abuse contact)
Add these three maintainer fields:
mnt-lower: IPbnb-MNT
mnt-routes: IPbnb-MNT
mnt-domains: IPbnb-MNT
Ensure you have access to the abuse-mailbox
Click SUBMIT
Critical Pre-Launch Check
Before adding your subnet to IPbnb, verify:
The subnet is not currently announced on the internet
All old route objects and related data are removed
IP reputation is clean (check using reputation monitoring tools)
You have access to the organization's abuse-mailbox email
All required RIPE fields are correctly filled
Why this matters: If any announcements or old data remain, the automated verification will fail, and you'll need to clean up before trying again.
***
Once all the steps above are complete and your RIPE object looks correct, you're ready to add your subnet to IPbnb. The automated verification checks your inetnum object against the requirements in this guide — so a clean setup now means no delays later.
If something doesn't look right after submission, the most common cause is leftover data from previous usage. Go back through the pre-launch checklist and make sure nothing was missed.
Questions? Reach out to our support team at support@ipbnb.com — we're happy to take a look.
Related articles