Help Center
Listing a Subnet
How to Add Your IPv4 Subnets to the IPbnb Marketplace
A step-by-step walkthrough for IP holders: from configuring your subnet in the RIPE database to going live on the IPbnb marketplace in under 30 minutes.
8
min.
Reading time
Beginner
Complexity level
Table of Contents
item
Overview
This guide will help you list your IPv4 addresses for lease on the IPbnb marketplace. Before your addresses can be leased, they must be properly configured in the RIPE database. Our guide walks you through each step of the process.
What you'll need:
Access to your RIPE NCC LIR portal
PA (Provider Allocated) status IPv4 addresses
Clean IP reputation
Access to your organization's abuse-mailbox email
New to IPv4 monetization? Start with our complete guide to monetizing IPv4 blocks.
Need help? Contact our support team at any time: support@ipbnb.com
Part 1: Adding Your Subnet to IPbnb
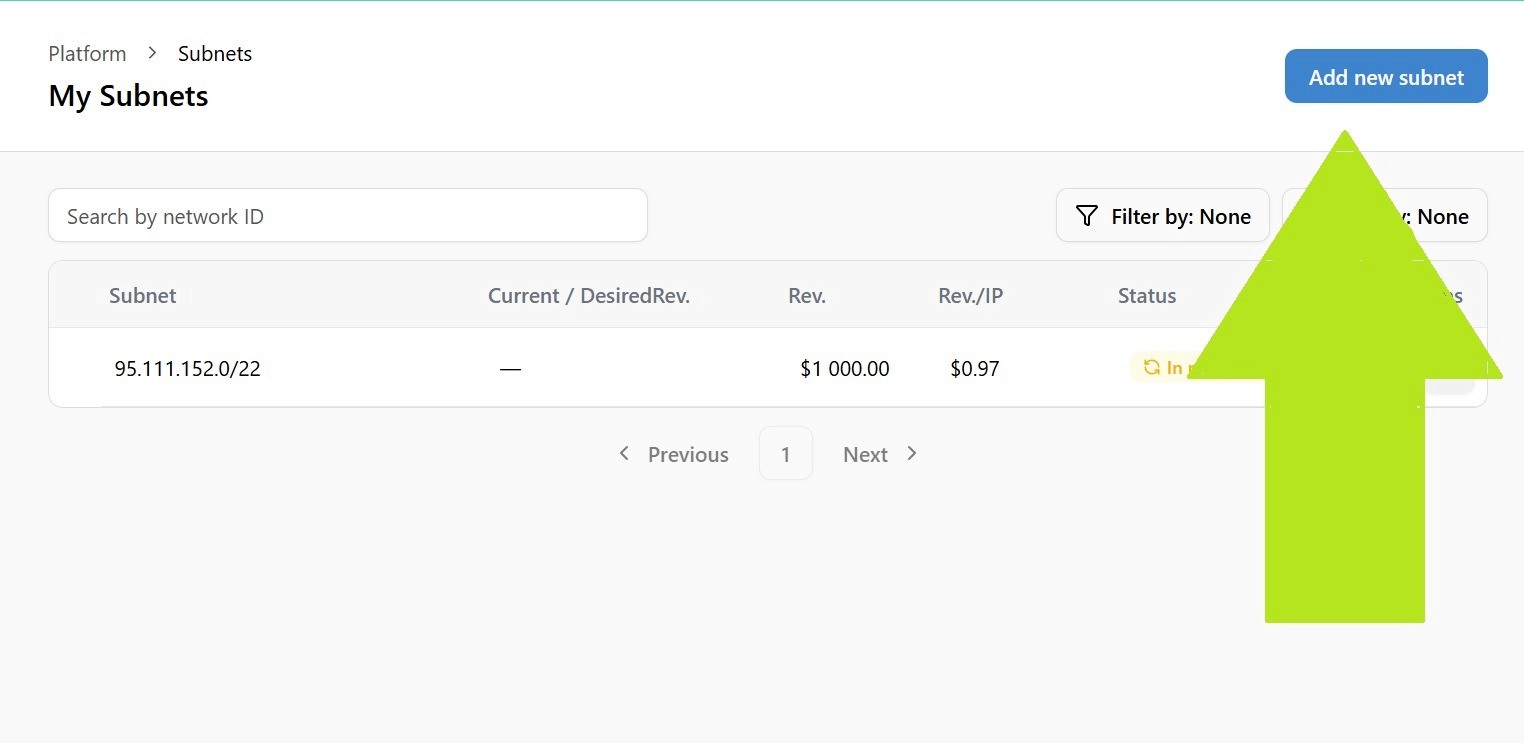
Step 1: Add Your Subnet
Log in to your IPbnb account
Navigate to Add New Subnet
Enter your subnet in CIDR format (e.g., 95.111.152.0/22)
If correctly configured, the system will show: Valid ✓
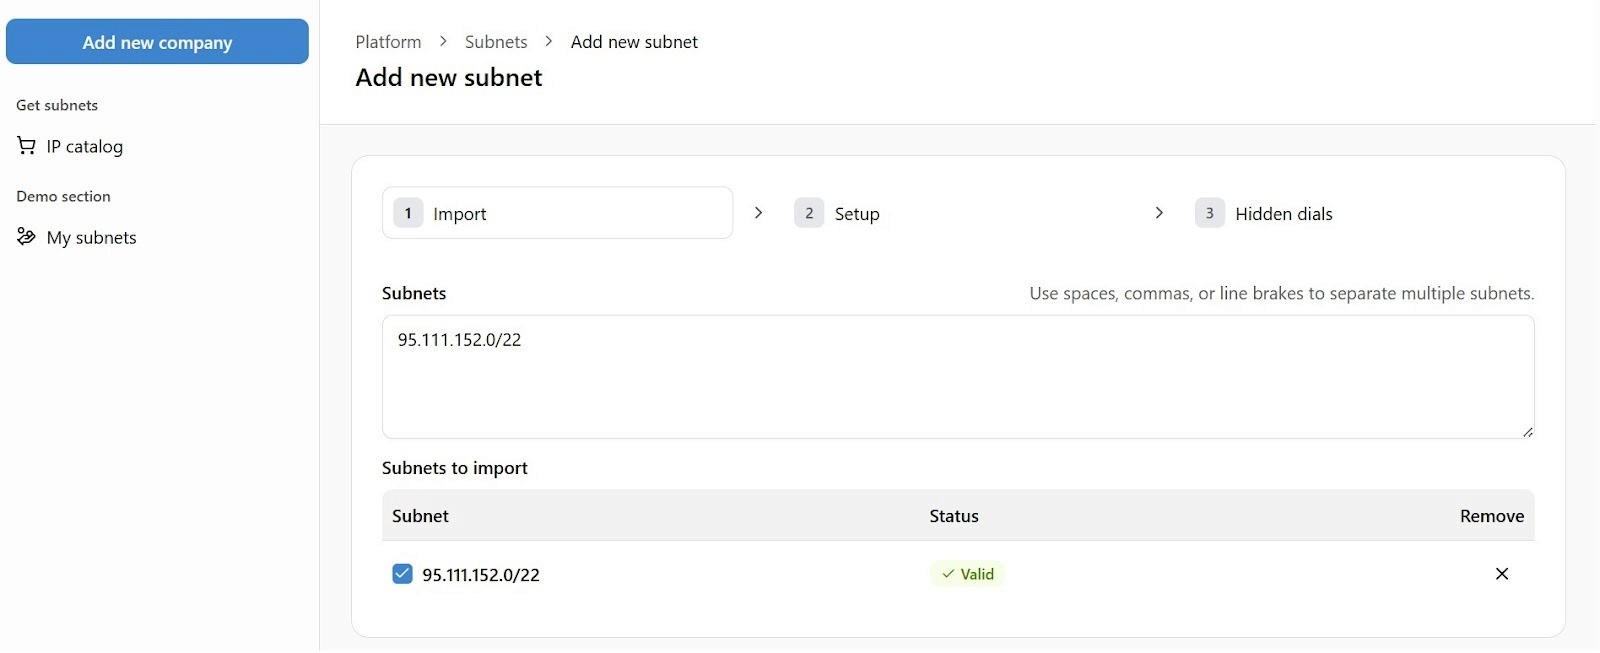
If you see an error message, review the RIPE configuration requirements above
Click Next
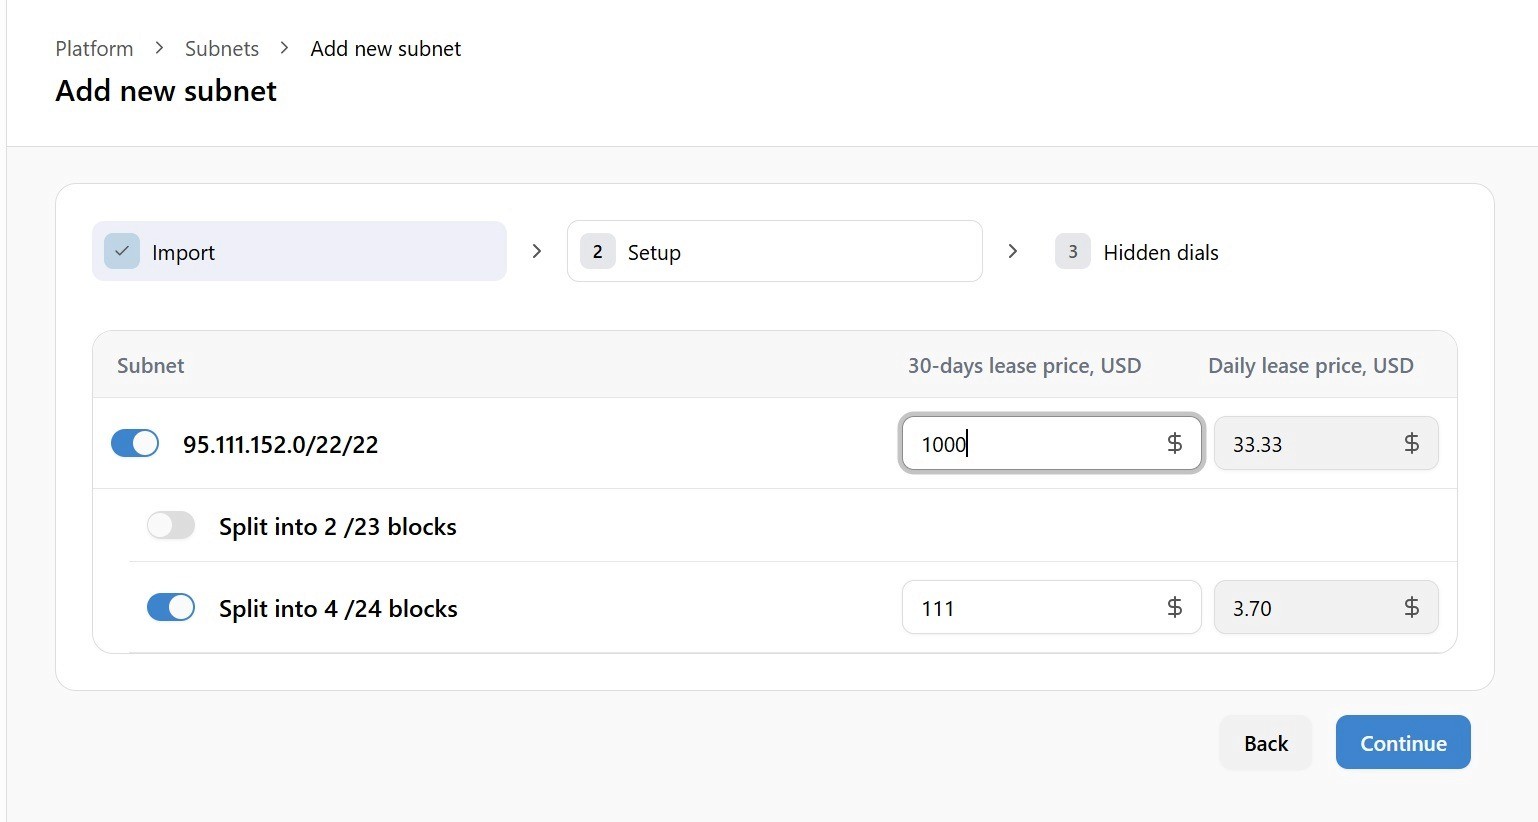
Step 2: Configure Your Listing (Import Tab)
Here you can customize how your addresses are offered:
Split into smaller blocks (optional)
Divide your subnet into smaller portions
Useful if you want to lease different sizes to different clients
Set pricing
Enter your monthly price per IP address
The platform automatically calculates daily rates
Estimate how much you can earn with our IPv4 earnings calculator.
Tip: Competitive pricing in the IPv4 market typically ranges from $0.35-$0.50 per IP per month
Not sure whether to sell or lease? Read our sell vs. lease decision guide.
Step 3: Setup Options
Hide from search (optional)
Set Private deal if you have a pre-arranged deal with a specific client
Private subnets won't appear in marketplace searches
Other users cannot book them, but your designated client can access them via direct link
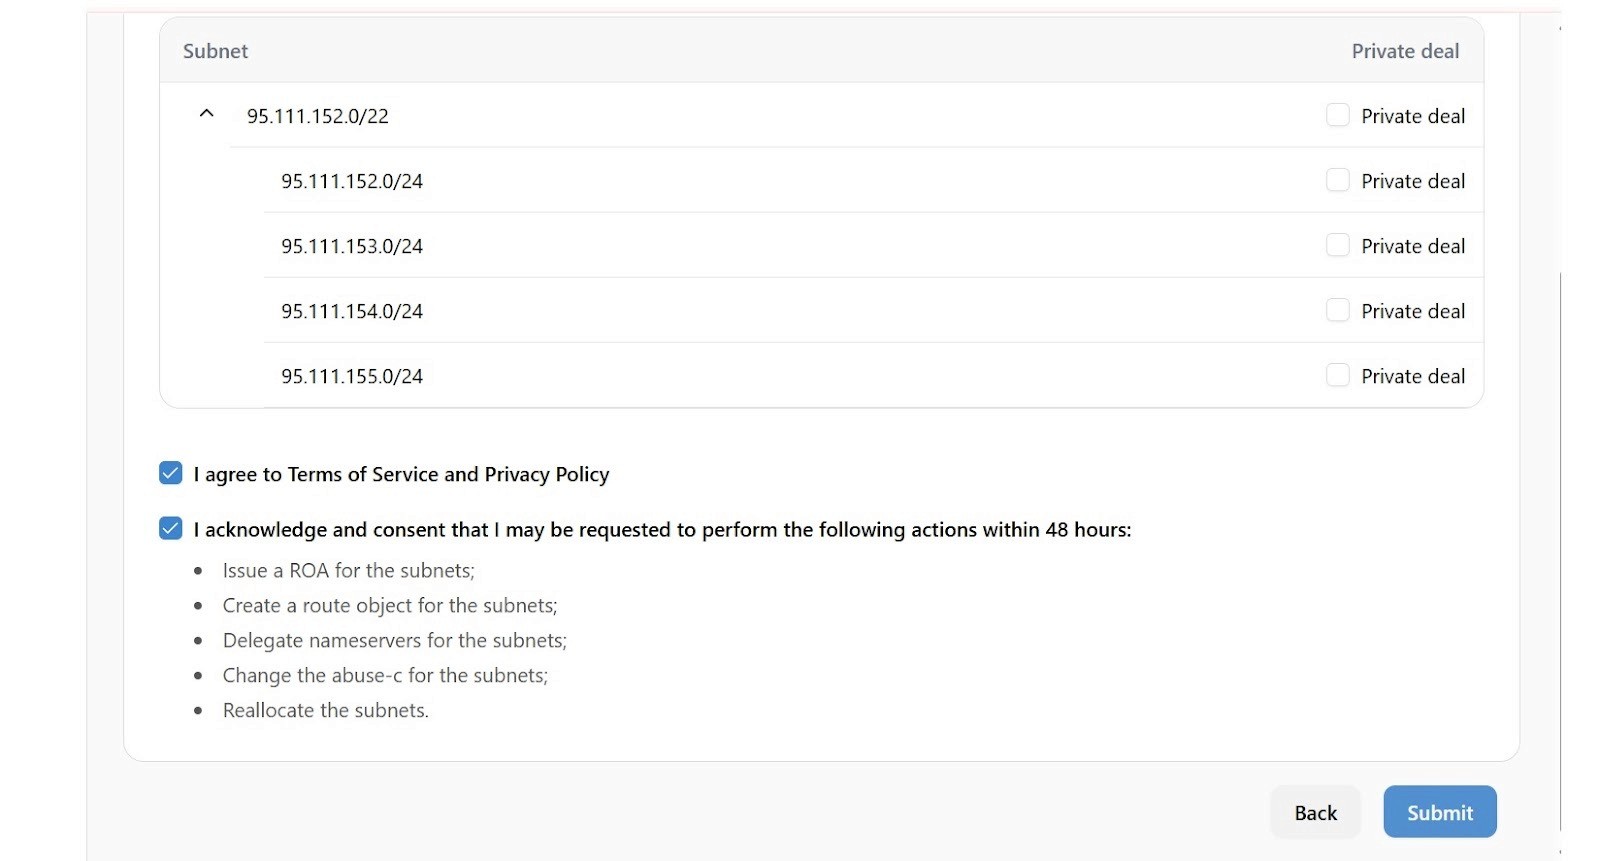
Step 4: Review and Submit
Review your configuration
Read and accept the Terms of Service and Privacy Policy
Click Submit
Your subnet is now added and pending verification.
Part 2: Email Verification
What happens now
The IPbnb platform will send a verification email to your organization's abuse-mailbox. This proves you own the IP addresses.
Finding your abuse-mailbox
If you don't receive the verification email within a few minutes:
Open your subnet's data in the RIPE database (https://apps.db.ripe.net/db-web-ui/query)
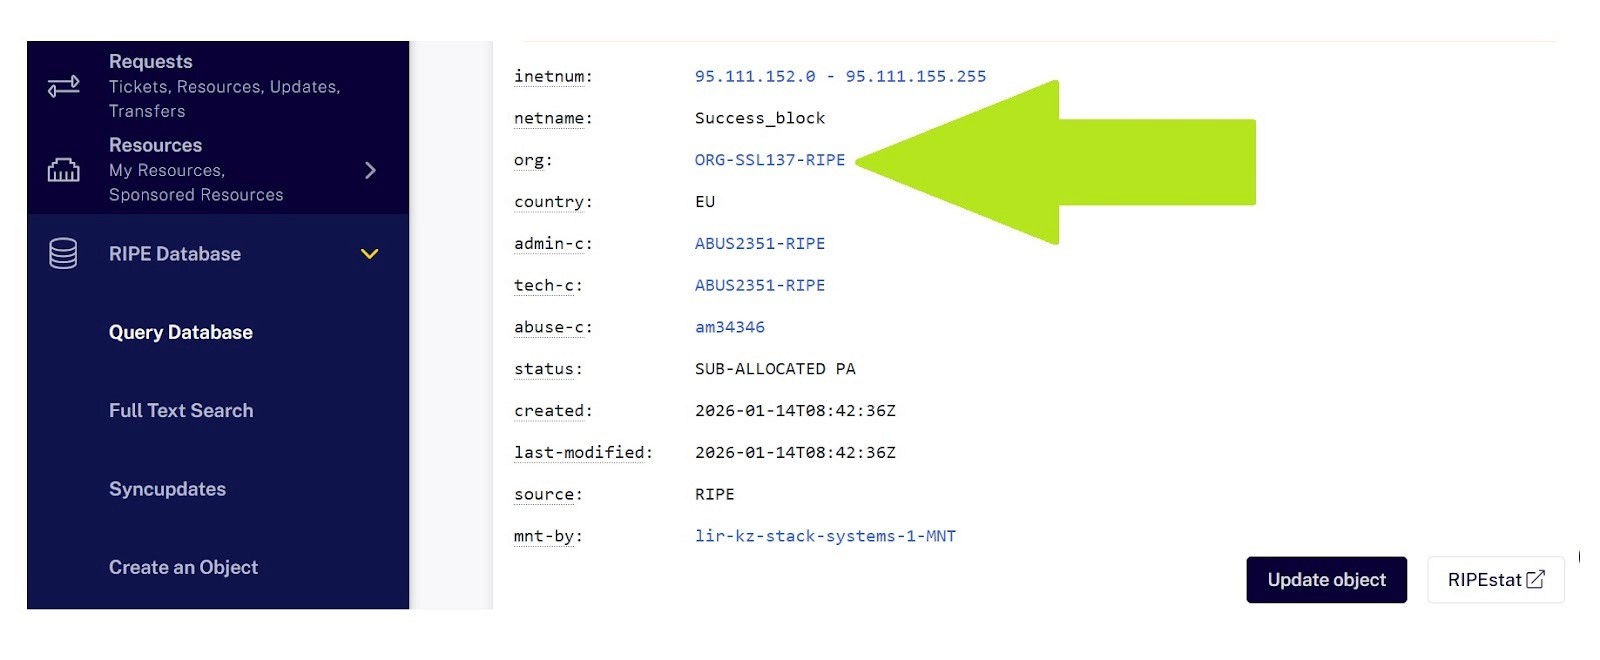
Click on the organization field value
Find the abuse-c field on the organization page
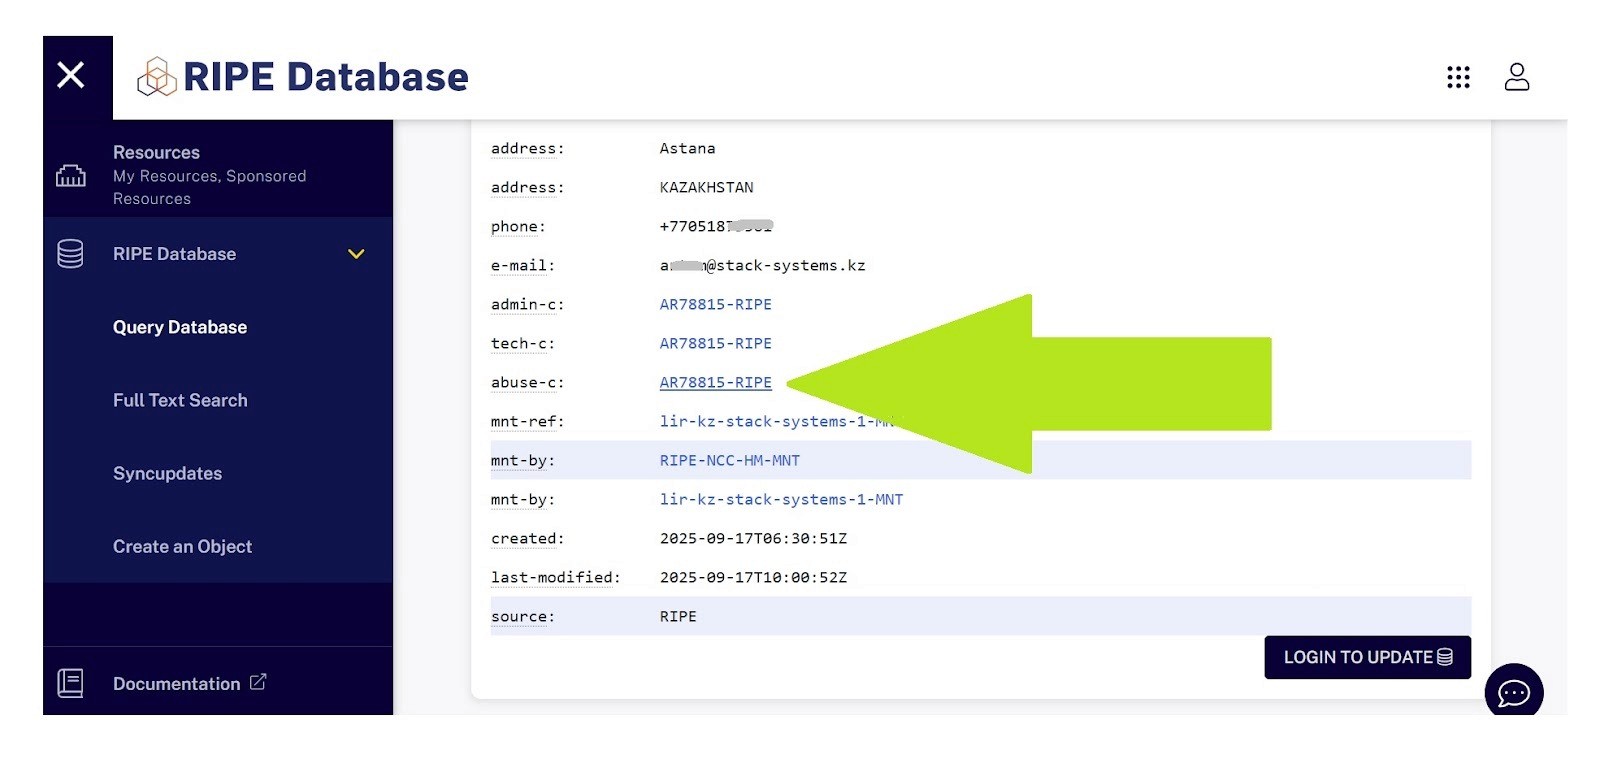
Click on it to see the full abuse contact details
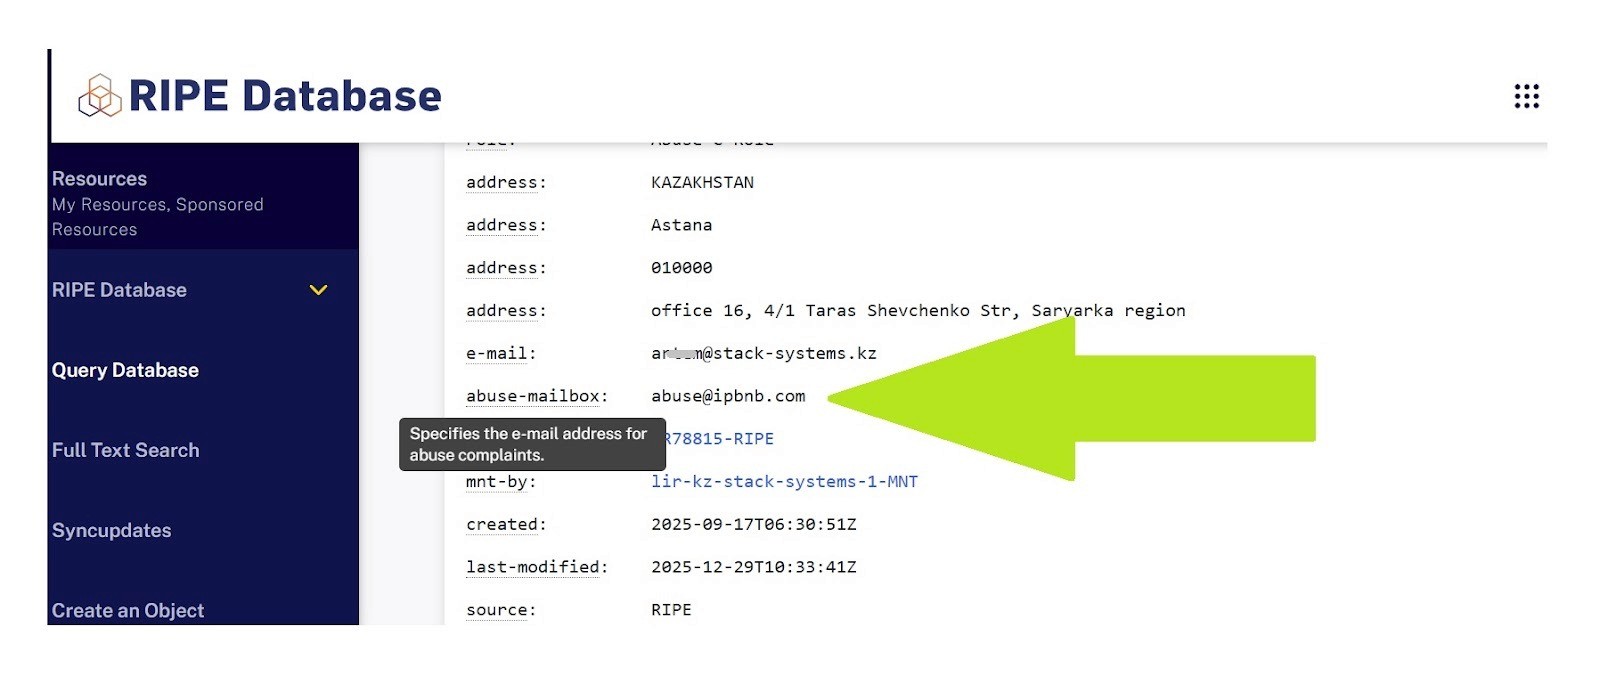
Look for abuse-mailbox – this is where verification emails are sent
Security note: This verification step ensures that only legitimate IP address owners can list resources on IPbnb.
Completing verification
Check the abuse-mailbox inbox
Open the verification email from IPbnb
Click the verification link
You'll see a confirmation: "Network verified and ready for lease."
Post-Verification
Once verified, your subnet will appear on the IPbnb marketplace and be available for leasing.
What you can do now:
Adjust pricing
Modify subnet splits
Hide or unhide from search
Monitor lease status
Update configurations as needed
Troubleshooting
"Subnet not valid" error
Possible causes:
Status is not SUB-ALLOCATED PA (for subnets larger than /24)
Missing or incorrect abuse-c field
IPbnb not listed as maintainer (mnt-by, mnt-lower, mnt-routes, or mnt-domains depending on scenario)
Missing organization field
Subnet is still announced on the internet
Solution: Review Part 1 and ensure all requirements are met. Check the specific error message for guidance.
"Reputation check failed" error
Cause: Your IP addresses appear on one or more abuse blocklists.
Solution:
Check your IPs using reputation monitoring tools
Clean the reputation (typically takes 30 minutes to 24 hours)
If reputation is actually clean but still showing as dirty, contact our support team
Verification email not received
Possible causes:
Incorrect abuse-mailbox configuration
Email in spam folder
Organization not properly specified in RIPE database
Solution:
Verify the abuse-mailbox email address (see Part 3 above)
Check spam/junk folders
Ensure you have access to that email account
Contact support if the issue persists
Manual verification option
If automated verification fails for any reason and you cannot resolve the issue:
Contact our support team at support@ipbnb.com
Provide your subnet details
Our team will review and manually verify your subnet if all requirements are met
Need Additional Help?
Our support team is here to assist you at every step:
Email: support@ipbnb.com
Live chat: Available in your IPbnb dashboard
Average response time: Under 2 hours during business hours
Quick Reference Summary
For subnets larger than /24:
Create new inetnum object
Set status to SUB-ALLOCATED PA
Add IPbnb as abuse-c (AM34346)
Add IPbnb as mnt-by (IPbnb-MNT)
Ensure organization is specified
Clear all announcements, related objects and RPKI ROAs
For /24 subnets:
Edit existing inetnum object
Add IPbnb as abuse-c (AM34346)
Add IPbnb-MNT as mnt-lower, mnt-routes, mnt-domains
Clear all announcements, related objects and RPKI ROAs
Then for all subnets:
Add to IPbnb marketplace
Configure splits and pricing
Accept Terms of Service
Confirm ownership via email received to abuse-mailbox
Start earning from your leased addresses
Related articles