Help Center
Renting a Subnet
How to Lease, Use, and Manage Subnets on IPbnb
This guide walks you through the full process of leasing an IPv4 subnet on IPbnb — from browsing the catalog to configuration and billing management.
7
min.
Reading time
Beginner
Complexity level
Table of Contents
item
The entire process takes around 15-20 minutes, assuming your company is already verified and your Credit Balance is funded. Bank transfers may add 1-3 business days.
Before You Begin
Before starting the leasing process, make sure you have the following ready:
A verified IPbnb company account. If you haven't registered yet, see our guide on account setup and company registration.
An ASN (Autonomous System Number) to assign to your leased subnet. If you don't have an ASN or need more information on the subject, check our instructions.
Confirmation from your network provider that they support BGP or BYOIP announcements.
If you're unsure about any of these requirements, contact us at support@ipbnb.com before proceeding.
Step 1: Browse and Select a Subnet
Estimated Time: 5-10 minutes
Once your company is verified, you can search for and select subnets to lease.
Accessing the IP Catalog
Go to ipbnb.com
Log in to your IPbnb account
You'll see all available subnets for lease
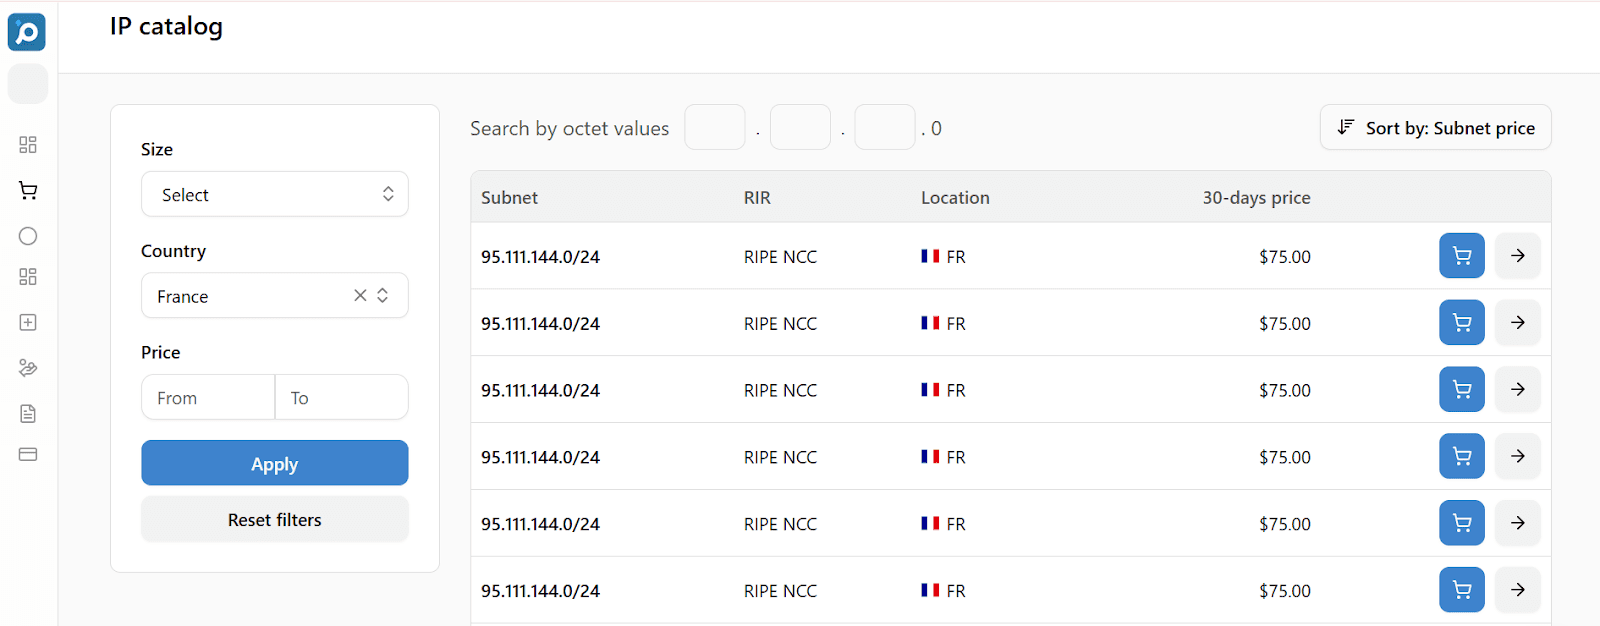
Filtering and Searching
The IP Catalog shows all available subnets. Use filters to find subnets that match your specific requirements:
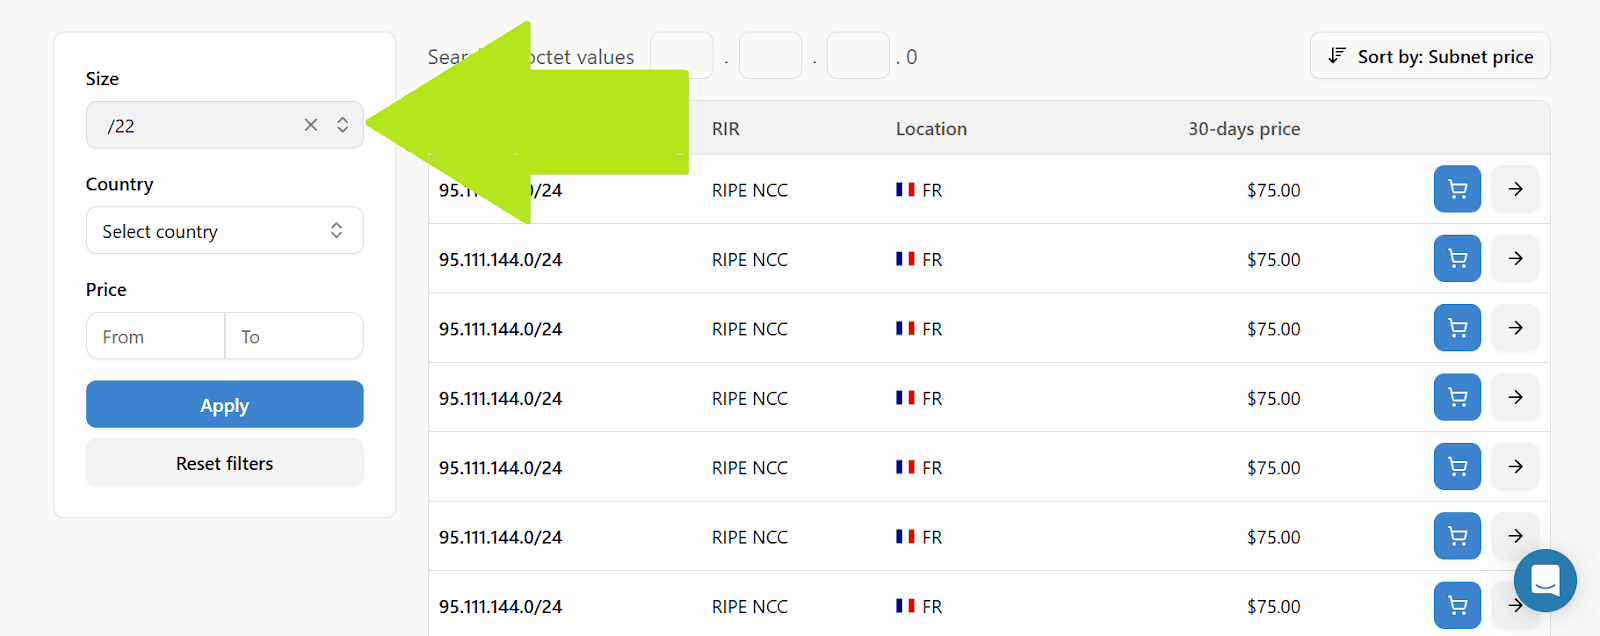
Filter by Subnet Size (CIDR Block)
Choose the number of IP addresses you need:
/24 = 256 IP addresses (most common for small to medium businesses)
/23 = 512 IP addresses
/22 = 1,024 IP addresses
/21 = 2,048 IP addresses
Larger blocks available for enterprises
Filter by Geolocation
Select the country or region where you want the IP addresses to be geolocated:
France
Germany
Netherlands
United Kingdom
Other countries
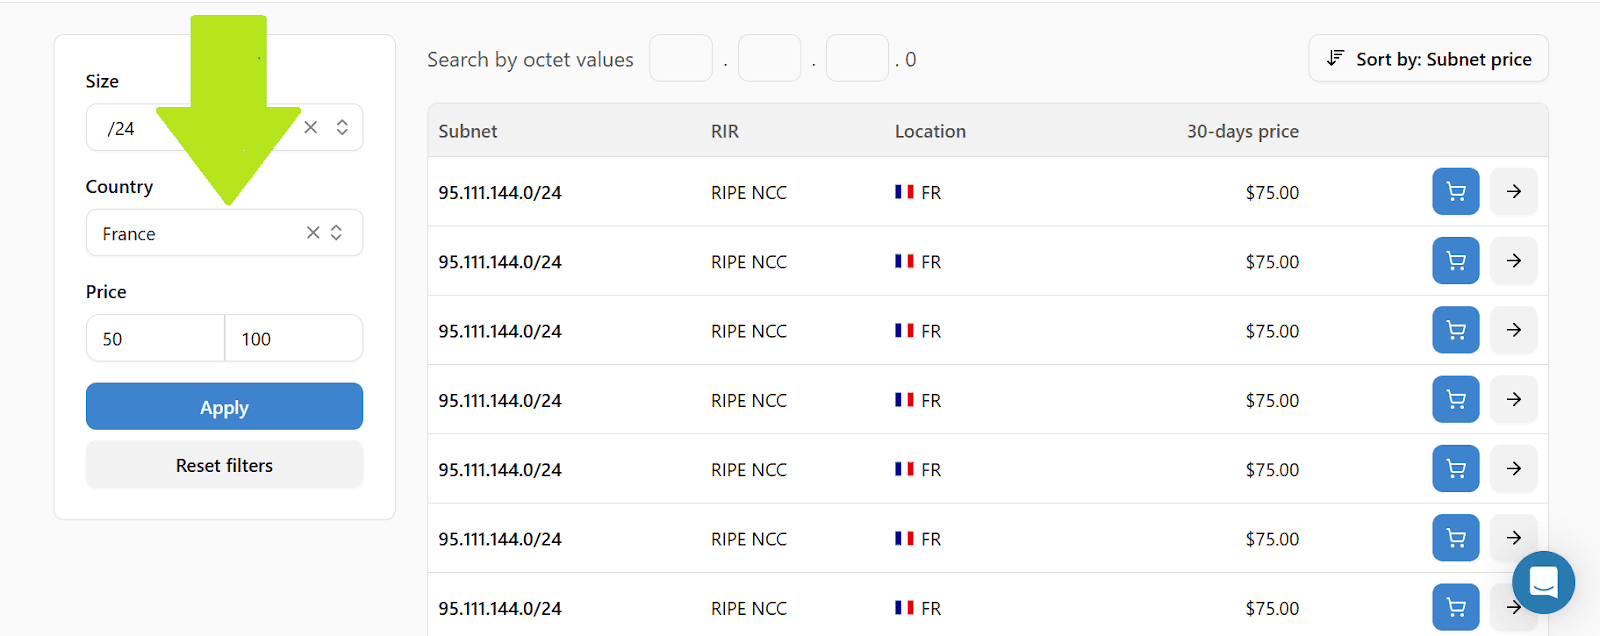
Filter by Price
Set your budget constraints:
Minimum price per month
Maximum price per month
The system shows subnets within your range
Price factors:
Subnet size (larger blocks cost more)
Geolocation (some regions have higher demand)
Market availability (supply and demand)
Advanced Filter:
Specific IP range (if you need particular octets)
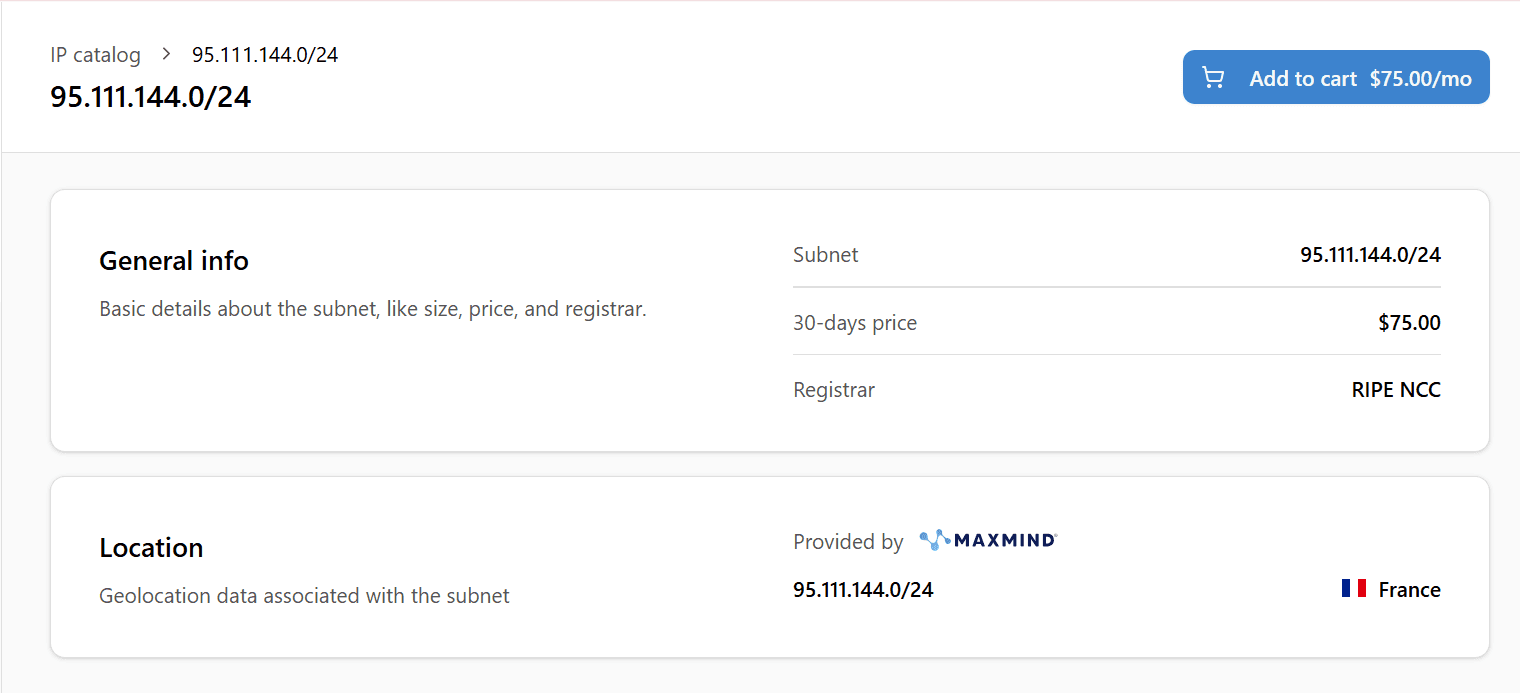
Viewing Subnet Details
Click on any subnet in the catalog to view detailed information:
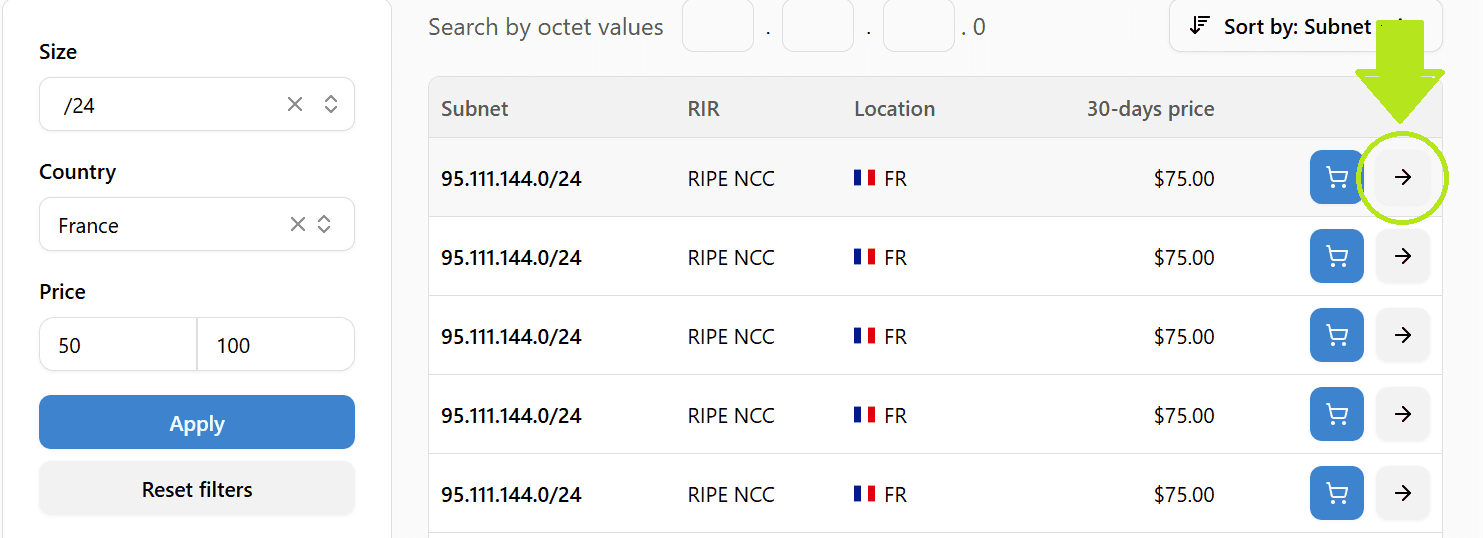
Subnet Information Displayed:
Subnet address. The IP address range (example: 185.123.45.0/24). This is the exact prefix you'll be leasing
Daily price. Cost per day in USD (the 30-day price is also shown for reference). This is the only fee you pay (zero platform fees)
Geolocation. Country (e.g., France). This is where the IP addresses are registered
Regional internet registry. Confirms European registry governance. Renters from all over the world can lease subnets, with no geolocation restrictions
IPbnb validates all subnets before listing them. If a subnet is in our catalog, it has passed our reputation checks and is safe to use.
Adding Subnets to Your Cart
Review Subnet Details
Verify the subnet size matches your needs
Check the price fits your budget
Note any special requirements
Add to Cart
Click the "Add to Cart" button
Confirmation message appears
Subnet is temporarily reserved for you
Cart Reservation Timer Starts
Important: You now have 180 minutes (3 hours) to complete your lease
Timer is displayed at the top of the page
After 180 minutes, the subnet is released back to the catalog
Other users can then lease it
Can you add multiple subnets? Yes. You can add as many subnets as you need to your cart. The 3-hour timer applies to your entire cart, not to individual subnets.
What if you need more time? The 3-hour window is generous. If you encounter issues:
Contact support@ipbnb.com immediately
Explain your situation
We may be able to extend your reservation
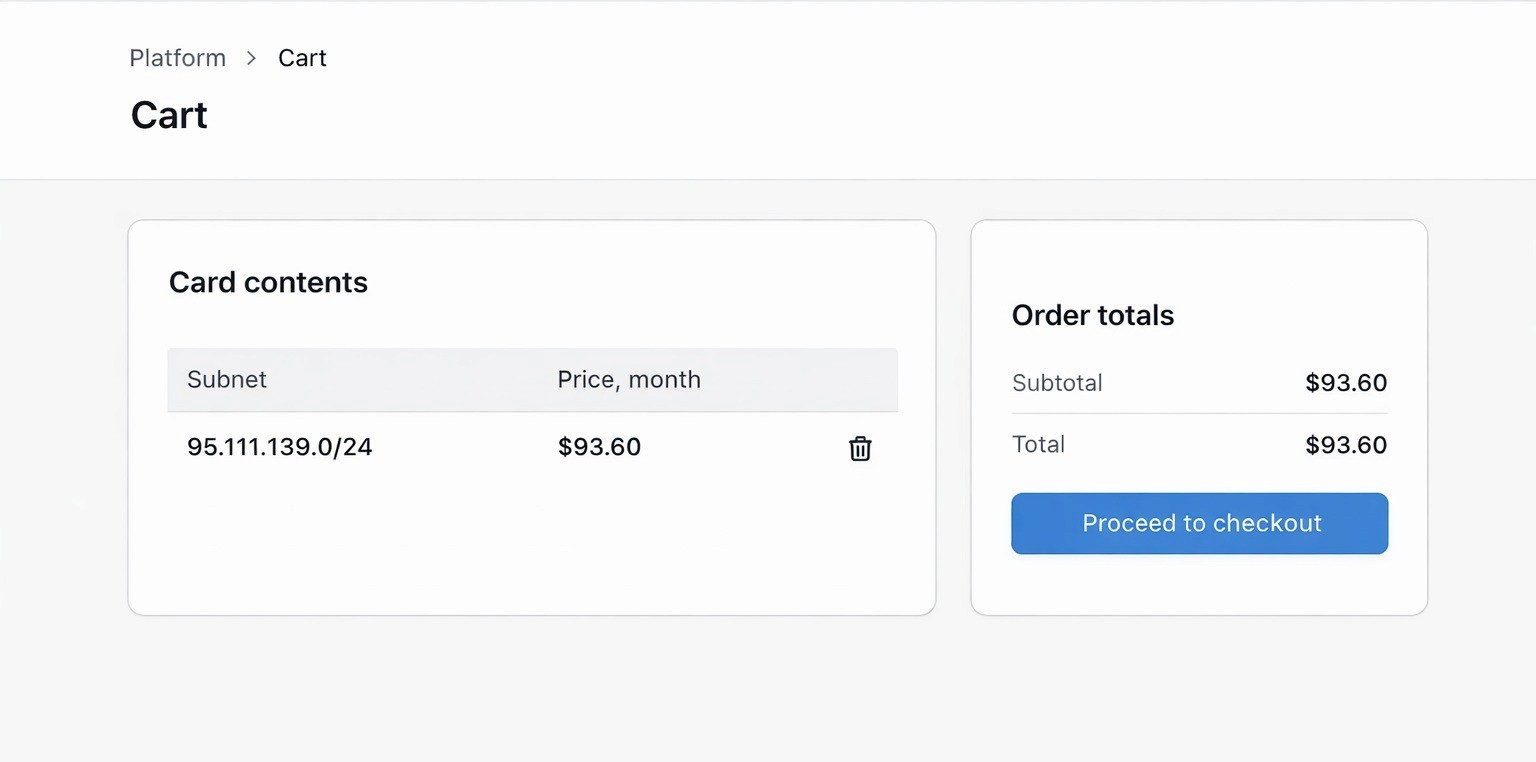
Review Your Cart
Click the Cart icon in the top navigation
Or click "View Cart" in the confirmation message
You'll see all selected subnets
Total cost is calculated
Remove Subnets (if needed)
In your cart, find the subnet you want to remove
Click "Remove" next to that subnet
Confirm removal
Subnet is released back to catalog immediately
Step 2: Payment and Completing Your Lease
Estimated Time: 5-10 minutes (or 1-3 business days for bank transfers)
Understanding Credit Balance
IPbnb uses a Credit Balance payment system.
How it works:
You add funds to your IPbnb Credit Balance in advance
When you start a lease, the cost of the first 30 days is deducted from your balance upfront
After the initial 30-day period, billing switches to daily: the cost of each day is automatically deducted from your Credit Balance at 00:00 UTC
You maintain one balance for all your leases
Benefits:
Predictability: Always see your available balance
No interruptions: Daily deductions happen automatically when balance is sufficient
Flexibility: Add funds using your preferred payment method
Important: Your Credit Balance is prepaid. You must have sufficient funds before you can complete a lease.
For a full breakdown of charges and billing cycles, see How Billing Works on IPbnb.
Available Payment Methods
You can add funds to your Credit Balance using:
Stripe (credit or debit card)
PayPal
Bank transfer (wire transfer)
To add funds, go to your account dashboard and navigate to Credit Balance - Add Funds. For bank transfer instructions, contact support@ipbnb.com.
Note: Bank transfers may take 1-3 business days to process. If you plan to use bank transfer, add funds well in advance of when you need them.
Completing the Payment
Once you have sufficient Credit Balance:
Go to your cart
Click the cart icon in navigation
Review all selected subnets
Verify total cost
Check Timer: Ensure you still have time remaining (within 180 minutes). If the timer expired, subnets were released - you'll need to add them again.
Click "Proceed to Payment"
Review summary one final time
Verify your Credit Balance is sufficient
Confirm payment
The system checks your Credit Balance. If sufficient: Payment processes automatically. If insufficient: Error message appears with instructions.
Payment Processing
Deduction happens instantly
No delay, no waiting period
Lease activates immediately
Lease Confirmation
Immediate Confirmation:
On-Screen Confirmation
Success message displays
Lease details shown
Next steps outlined
Email Confirmations Sent (you receive TWO emails):
Email 1: Payment Confirmation
Subject: "Payment Processed - IPbnb Credit Balance"
Contains:
Amount debited from your balance
New balance after deduction
Transaction ID
Date and time
Receipt (PDF attached)
Email 2: Lease Confirmation
Subject: "Subnet Leased Successfully - [subnet address]"
Contains:
Subnet address
Daily cost and 30-day reference price
Lease start date
Daily billing start date (the day after lease creation, UTC)
Expiration date of the initial prepaid 30-day period
Next steps for configuration
All Company Users Receive Confirmation
Every user associated with your company account receives both emails
Ensures transparency and awareness across your team
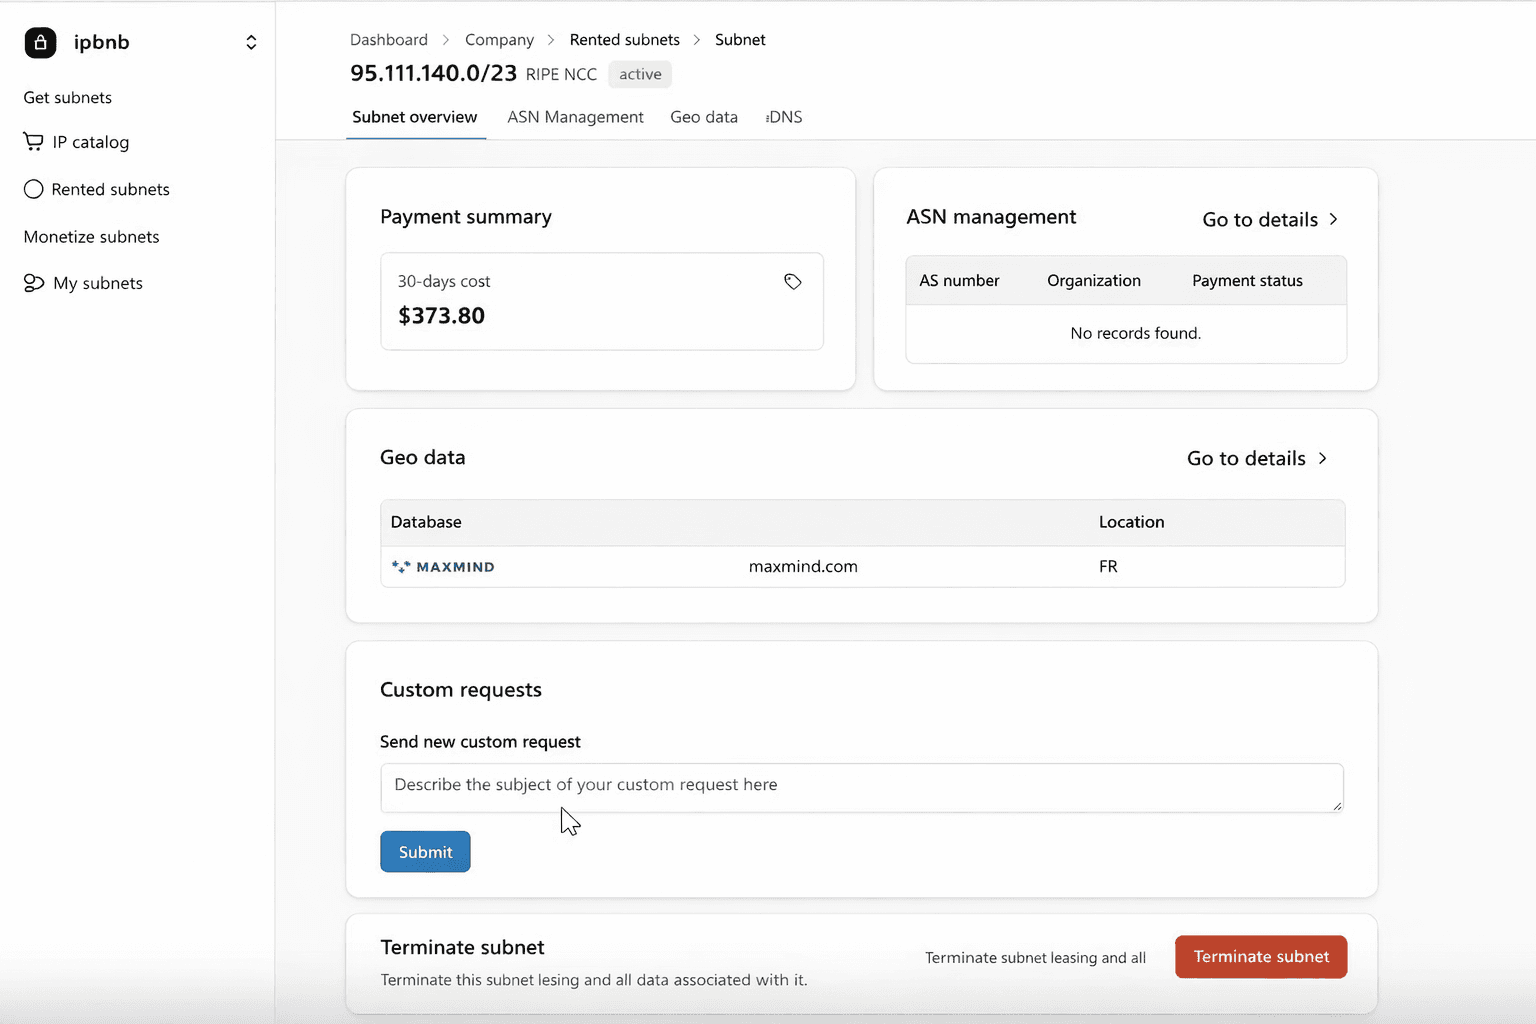
What Happens to Your Subnets:
Subnets move from "Cart" to "Rented Subnets"
You can now proceed to subnet configuration - see Step 3 below
Step 3: After Your Lease - ASN Assignment and Configuration
Once your lease is active, your subnet needs to be assigned to an ASN and announced through your network provider before you can use it.
What you need to do:
Assign your subnet to your ASN in the IPbnb dashboard
Navigate to Rented Subnets
Select your subnet
Click "Assign to ASN" and enter your ASN details
Provide your network provider with the LOA (Letter of Authorization). IPbnb generates this document for you automatically after ASN assignment. Your provider needs it to begin announcing your subnet.
Wait for routing to propagate. BGP route propagation typically takes a few minutes to a few hours depending on your provider
Important: Your subnet will not route traffic until it has been assigned to an ASN and your provider has completed the announcement. Do not close your hosting or server configuration until this step is done.
If you need help with ASN assignment or routing setup, contact support@ipbnb.com.
Lease Terms and Billing
Standard Lease Terms:
Minimum Lease Period: 30 days (one month)
Billing: Daily, after the initial 30-day prepayment
Automatic continuation: Daily deductions continue automatically unless you terminate the lease
Payment Method: Automatic deduction from Credit Balance
Currency: USD (United States Dollars)
How Billing Works - Step by Step
When you start a lease, the first 30 days are charged upfront from your Credit Balance.
From day 31 onward, the daily cost is deducted automatically at 00:00 UTC each day.
Your lease continues indefinitely until you submit a termination request.
Note on billing start time: The first billable day is the calendar day after your lease is created (UTC). For example, if you start a lease at 11:00 AM UTC on a given day, daily billing begins at 00:00 UTC the following day.
Billing Example
You lease a subnet on December 10 at 2:00 PM UTC. The daily rate is $10.
Your Credit Balance is charged $300 (30 days) upfront at the moment of lease creation.
Daily billing starts on December 11 at 00:00 UTC.
The last prepaid day is January 9.
From January 10 onward, $10 is deducted from your Credit Balance automatically each day at 00:00 UTC.
How Low-Balance Alerts and Payment Recovery Work
IPbnb monitors your Credit Balance proactively. Alerts and recovery actions are triggered when your balance drops to 10 days of coverage or less.
If your payment method is bank transfer:
When balance drops to 10 days or less: you receive an email notification with a proforma bill for the next 30 days. This is not an automatic charge - you need to initiate the wire transfer manually.
Reminder emails are sent daily as long as the balance remains below 10 days
3 days before funds run out: the situation is escalated to the support team
If your balance runs out: the system deducts the remaining amount, allowing your balance to go negative, and support is notified
If the situation is not resolved the following day: your leases are terminated and your subnets are placed in quarantine before returning to the catalog
If your payment method is Stripe or PayPal:
When balance drops to 10 days or less: you receive an email with a link to top up your balance; reminders are sent daily
3 days before funds run out: the system attempts to charge your payment method for the next 30 days; you receive an email confirming success or failure
2 days before funds run out: another charge attempt is made; if unsuccessful, the situation is escalated to support
On the day funds run out, the system attempts to charge in the following sequence:
Full charge for the next 30 days
If declined - charge for the next 5 days
If declined - charge for 1 day
If all attempts are declined: your balance goes negative and support is escalated
If there is no contact with you the following day: your leases are terminated and subnets are placed in quarantine before returning to the catalog
How to Avoid Payment Issues:
Keep your Credit Balance topped up with enough funds to cover at least 10 days across all active leases
If you use bank transfer, add funds proactively - wire transfers take 1-3 business days and cannot be processed instantly
Respond promptly to any low-balance alert emails
Monitor your balance in the dashboard regularly
Can you change your billing cycle? IPbnb uses daily billing after the initial 30-day prepayment. This applies to all leases and cannot be changed.
Terminating a Lease
You can submit a termination request at any time after the first 30 days of your lease.
How to terminate:
Go to Rented Subnets in your dashboard
Find the subnet you want to terminate
Click the termination option and select your preferred end date
Termination options:
Next day: your lease ends the following day after the request is submitted
Specific date: you choose any future date for the lease to end
What happens after termination:
You receive an email confirmation of the termination request
Your subnet remains active until the selected end date
Daily billing stops on the termination date
After termination, make sure your network provider stops announcing the subnet
Important: Termination is not available during the first 30 days of a lease, except in cases of technical issues with the subnet or problems on the owner's side. If you experience such issues, contact support@ipbnb.com.
Need More Help?
Can't find the answer you need?
Contact us anytime:
Email: support@ipbnb.com
Include: Company name, subnet address (if applicable), and detailed question
Want to suggest improvements to this guide?
Email: feedback@ipbnb.com
We continuously update our documentation based on user feedback
Related articles